After running the gauntlet of development, bug fixes, and merge conflicts, you’re finally ready to release your app to users. You submit it to the App Store and… it’s rejected. A rejection from the App Store review team is a frustrating setback for any developer, and definitely something you want to avoid.
Before you send your precious app off to Apple, you’ll need to make sure you’ve taken care of all of the crucial things the software giant expects. There are a lot of mistakes developers make when submitting an app to the App Store, and many can be easily avoided or rectified.
In this article, we’ll give you a refresher on the entire process of submitting your app, focusing on the various app info, metadata, and assets required along the way. And, we’ll take a look at the most common App Store rejection reasons and how to resolve them.
Before You Begin
You’ll need to create an iOS App Store Package (or <code>.ipa<code> file) for your app. This package contains everything needed for Apple to install the app on a device: not just the app file itself, but various other information and assets like the app name, developer name and ID, bundle identifier, copyright information, certain app icons, and so on.
When you upload the binary to the App Store, you’ll need to provide various forms of your app icon and an app description, so make sure you have those ready. You’ll also need to prepare some screenshots, and these can take a bit of time to get right.
App information: name, description, and more
When submitting your app to the App Store, you are required to fill in App Information: a set of properties of an app that are shared across platforms and versions. They include the name of your app, a more detailed description of your app, the categories that best describe your app, and more. All of these properties can have a big impact on your app’s discoverability and appeal. When a user is searching around for an app like yours, does your app have the right name and keywords to ensure it shows up high in their search results? Does your app icon capture potential users’ attention? Building a great app is hard, and your efforts could be wasted if no one knows what your app does or you can’t entice people to download it.
App name
Here, Name is the name of your app as it appears on the App Store. It must be at least two characters and no more than 30. It can be edited until you submit the app for review.
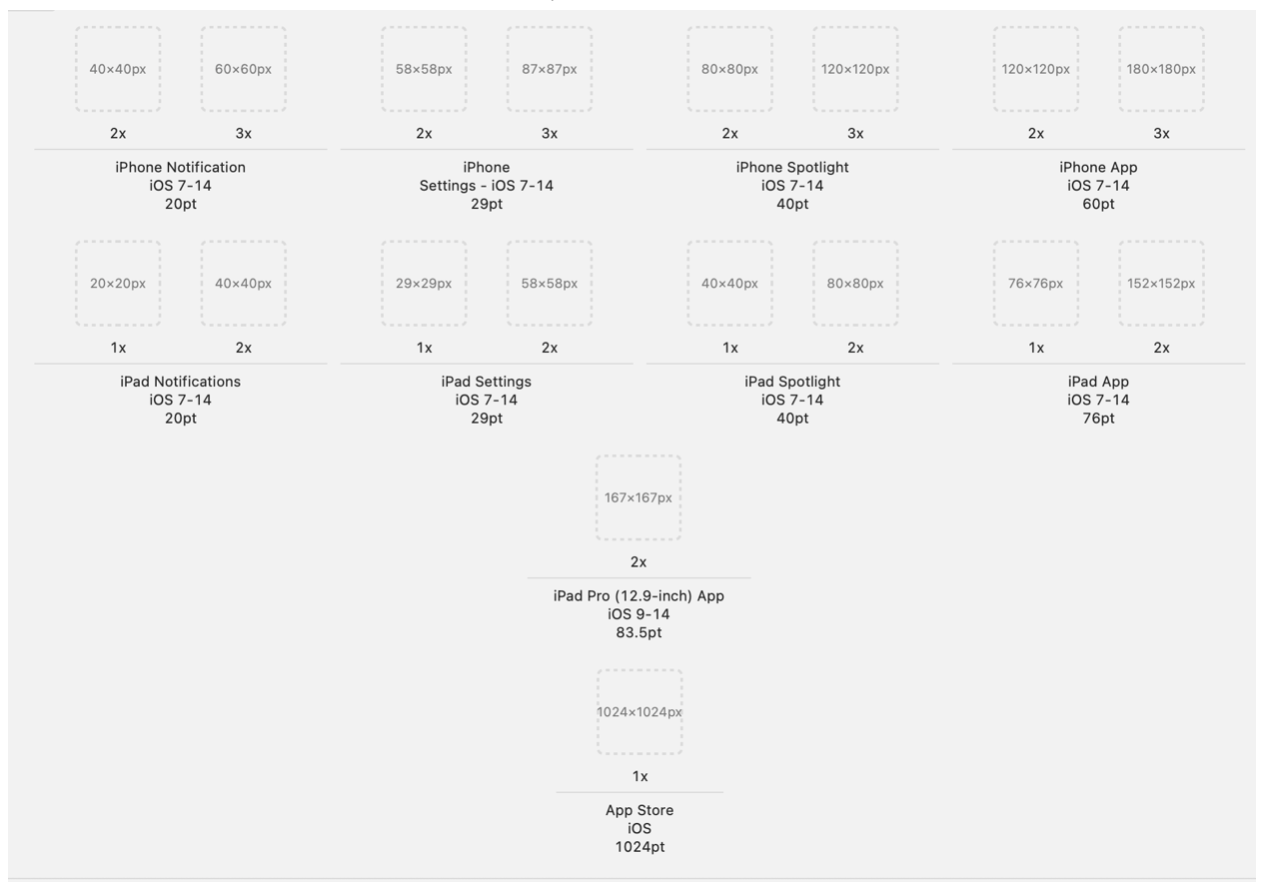
App icons
All apps will include small icons for use on a phone’s Home screen and throughout the system once your app is installed. A larger asset is used for presenting your app in different sections of the App Store.
Screenshots and previews
The App Store also uses screenshots and app previews (short videos) to visually communicate your app’s user experience on your App Store product page. Uploading an app preview is optional, but you must upload at least one screenshot.
The first one to three screenshots you supply will appear in search results, if your app has no preview available. Therefore, remember to display your strongest messaging and most exciting features in these first few screenshots of your app. Unless you want to get fancy, stick with a short, punchy caption on a clean background. Check out WhatsApp’s screenshots on the App Store, for example:

Make use of keywords and categories
When users search for an app, the App Store returns a list that is ranked based on text relevance (words that match your app’s name, keywords, and primary category) and user behavior (downloads, and number and quality of ratings and reviews). Given that you have no direct control over user behavior, make the most of the former!
When choosing keywords, you’ll want to pick ones that are short, searched for often, and not entirely overlapping with those of other similar, competing apps. Your keywords should fully and accurately reflect what your app does. You should use as many keywords as you can fit into the allotted space, and there are even some tricks that allow you to easily expand the number of keywords that App Store’s search algorithms will take into account. In terms of other text, like name and description, be specific when describing your app’s features and functionality, and avoid special characters unless they are part of your brand identity.
Categories on the App Store can help users discover new apps to meet their needs. The primary category you select is the most important one for your app’s discoverability, since it helps users find your app in the right places when browsing the App Store or filtering search results. It also determines whether your app appears in the Apps tab or Games tab.
The practice of fine-tuning your App Store presence and search performance is a whole field unto itself, commonly referred to as App Store Optimization (ASO).
Update your app regularly
Releasing updates to your app regularly can help you stay competitive on the App Store. In Apple documentation about app updates they encourage you to consider each update as “an opportunity to re-engage existing users and to attract new users”.
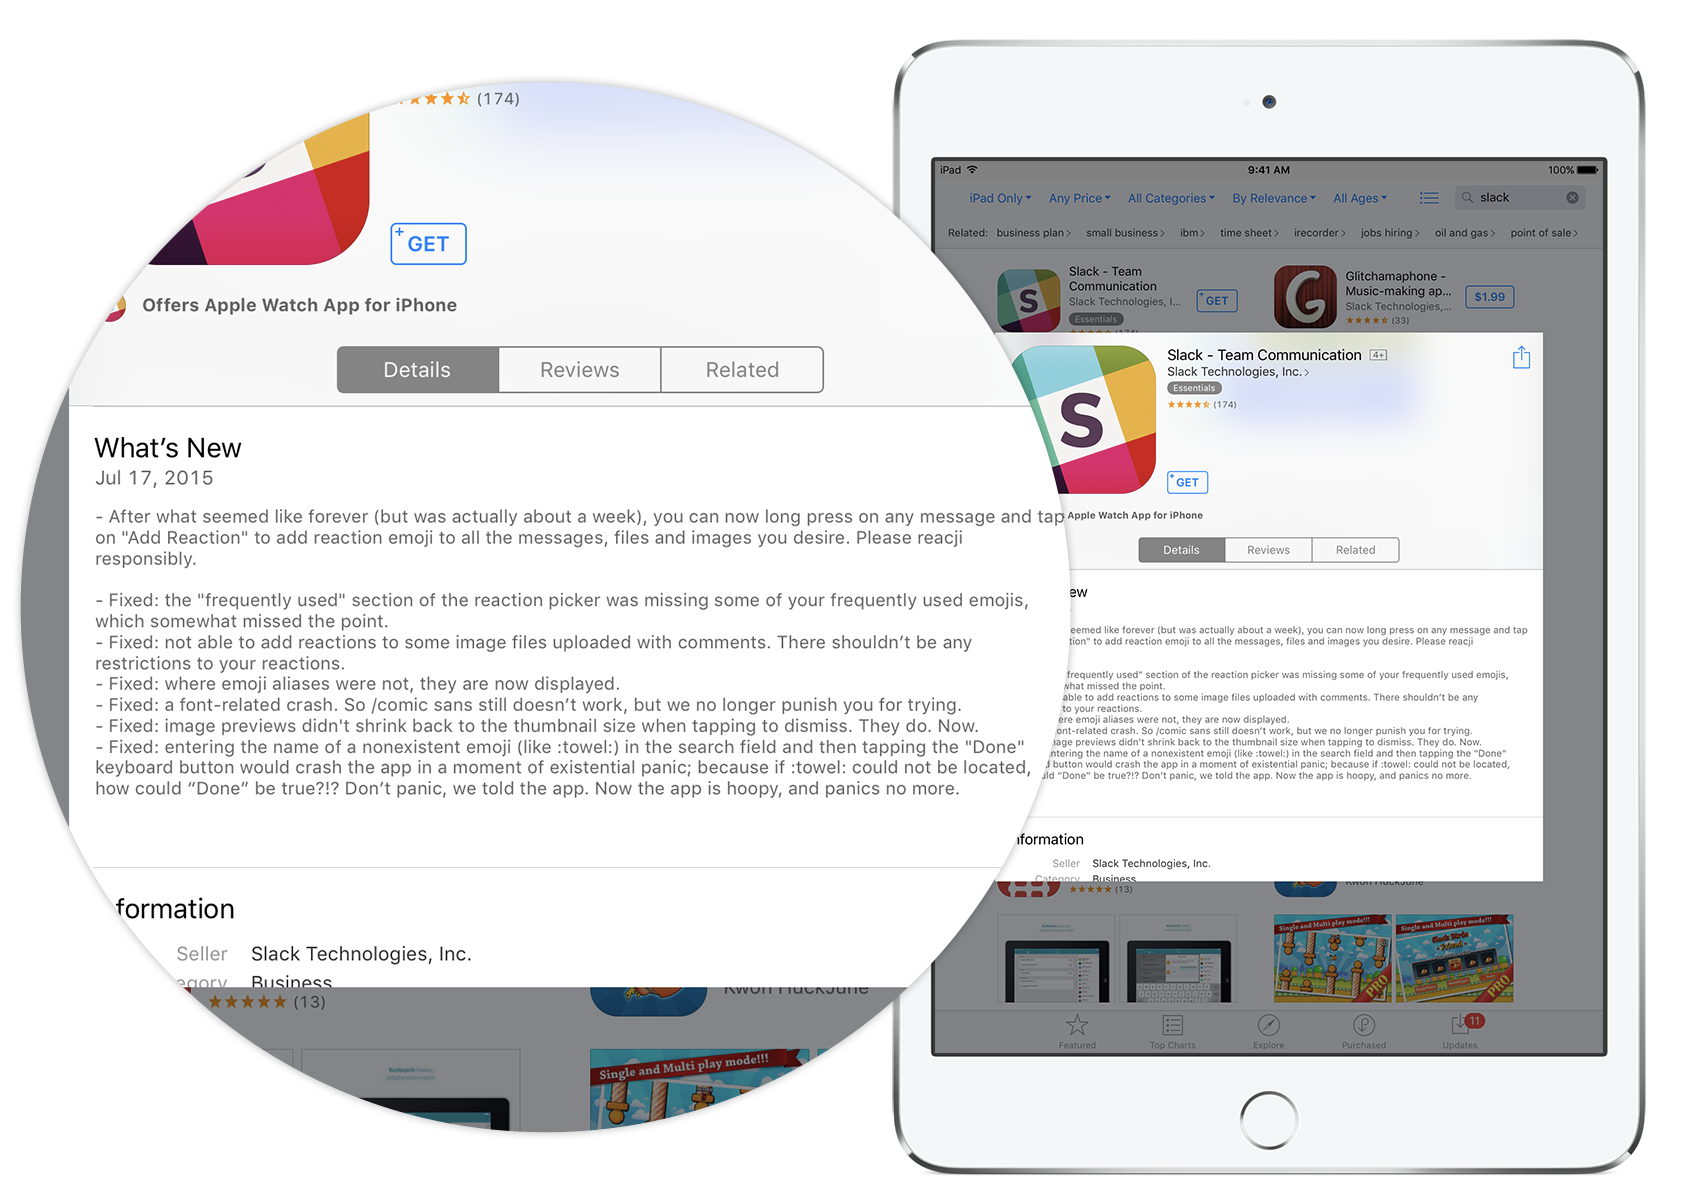
Each time you update your app, you’re asked to enter What’s New in This Version notes in App Store Connect. This is often the first place to let new and existing users know about any changes. If features are added or bugs fixed based on feedback or reviews, it’s an opportunity to communicate directly with users and let them know that they are being heard. The best apps also use What’s New notes to support their brand identity and communicate in the voice of the app instead of in purely technical language.
Here is an example from Apple’s documentation, highlighting What’s New notes from Slack:
Common App Store rejection reasons
User experience and privacy are both extremely important to Apple. To ensure that apps in their ecosystem offer a high quality user experience and treat user data appropriately, Apple employees review app updates each and every time they’re submitted. Apple will reject your submission if it doesn’t meet their standards.
Apple has provided detailed guidelines you need to follow to meet their standards and avoid rejection. The compliance of metadata, screenshots, and other information related to your app’s store presence is just as important as that of your app itself. There’s a lot you need to get right but, fortunately, you’re generally given multiple chances to correct app rejection criteria as you pass through App Store review. Note that metadata rejections can often be handled relatively simply, by updating data, whereas other rejections will require you to address issues in the app itself and then re-submit a new build.
Here are some of the most common and most important App Store review red flags to watch out for:
- Ensure that your app runs smoothly, without any crashes or bugs. Apple doesn’t take too kindly to apps with broken functionality! Be sure to test on multiple physical devices and in various scenarios, for example under poor network conditions or heavy concurrency, etc.
- Your app could be rejected because of broken developer support links. When submitting your app, be sure you provide the required link to user support with up-to-date contact information and a link to your privacy policy as well.
- Do not submit your binary if it has placeholder content that is not ready to be distributed. Finalize all images and text in your app before sending it in for review. If something needs to be updated down the road, you can always submit new versions.
- Make sure any content or functionality that is tied to backend services is working during the window of time that Apple may be reviewing your update.
- User privacy is very important to Apple. All apps submitted to the App Store that access user data are required to include purpose strings. If your code calls any APIs that touch sensitive user data, such as camera access, contacts, or messages, the app’s <code>Info.plist<code> file should contain a <code>$!{infoPlistKey}<code> key with a user-facing purpose string explaining clearly and completely why your app needs that data.
- Your app screenshots must accurately reflect your app’s functionality. Use text and overlay images to highlight your app’s user experience, not obscure it. Your screenshots should be appropriate for all audiences, even if your app is meant for a more mature audience.
- If your screenshots contain device illustrations or frames, make sure the model of device shown agrees with the screen size of the screenshot set. For example, your 6.5 inch screenshots shouldn’t depict smaller iPhones with Home buttons.
- Ensure all of your reviewer information (demo account login credentials, any configuration or testing instructions, contact info) is correct and will allow reviewers to access all areas and functionality of your app.
- Choosing a category that isn’t relevant to your app may cause it to be rejected when submitted for review.
- Submitting several separate apps that are essentially the same ties up the app review process and you’ll run the risk of rejection for any or all of those apps. Apple advises against this behavior: don’t release similar or identical apps separately.
Consider automation: App Store Connect API
With so much to stay on top of throughout the App Store submission process, the mental overhead adds up, especially as you start releasing and updating more frequently. To help standardize your process and make it more repeatable, you can automate tasks in App Store Connect using the App Store Connect API. Calls to the API require JSON Web Tokens (JWT) for authorization; you can generate the API keys needed to create these tokens in your organization’s App Store Connect account.
Apple is slowly exposing more and more functionality via the API; here are some things you can already do:
- Manage beta builds of your app, testers, and test groups through TestFlight.
- Create new app versions and manage App Store information like What’s New notes and screenshots.
- Submit your app for review.
- Send invitations for new users to join your team, adjust users’ level of access, and remove users.
- Manage bundle IDs, capabilities, signing certificates, devices, and provisioning profiles.
- Download aggregate metrics and diagnostics for versions of your app.
- Download sales and financial reports.
App Store Connect API key
As mentioned above, requests to the App Store Connect API require authorization using JSON Web Tokens (JWTs), and you’ll need to create an API key to sign these JWTs. To generate API keys, you must have the App Store Connect “admin” role within your team.
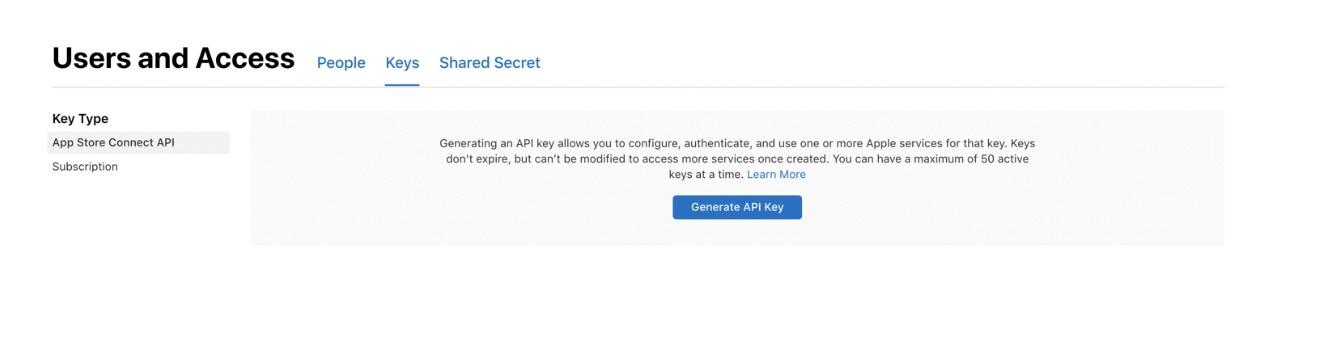
Log in to App Store Connect and select Users and Access, then click into the Keys tab.
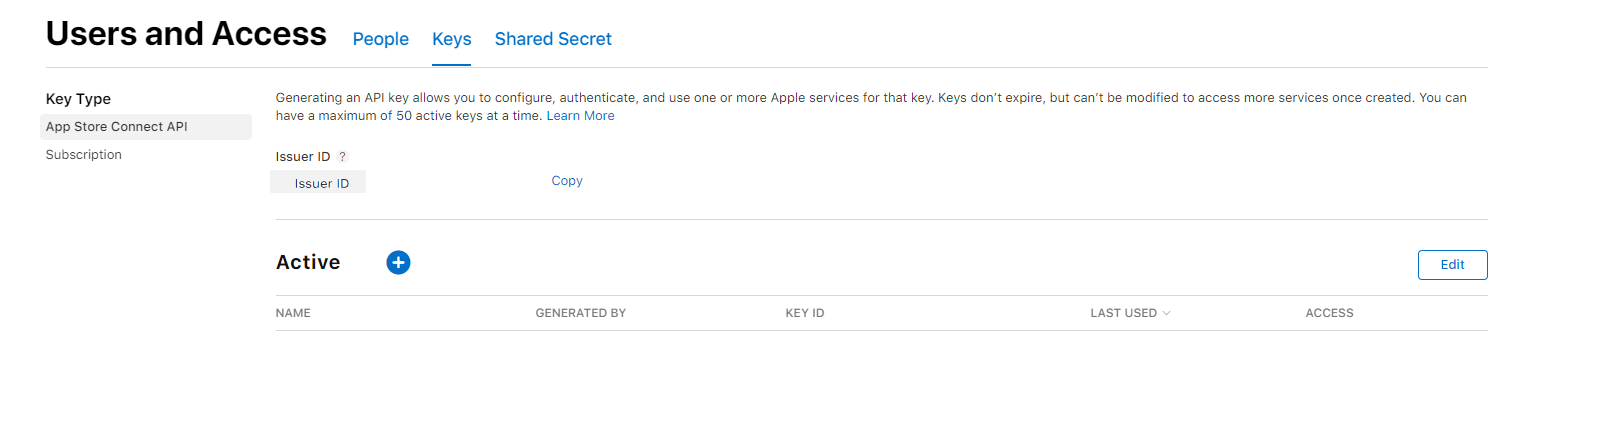
Click Generate API Key or the + icon
Enter a name for the key. The name is for your reference only and is not part of the key itself.
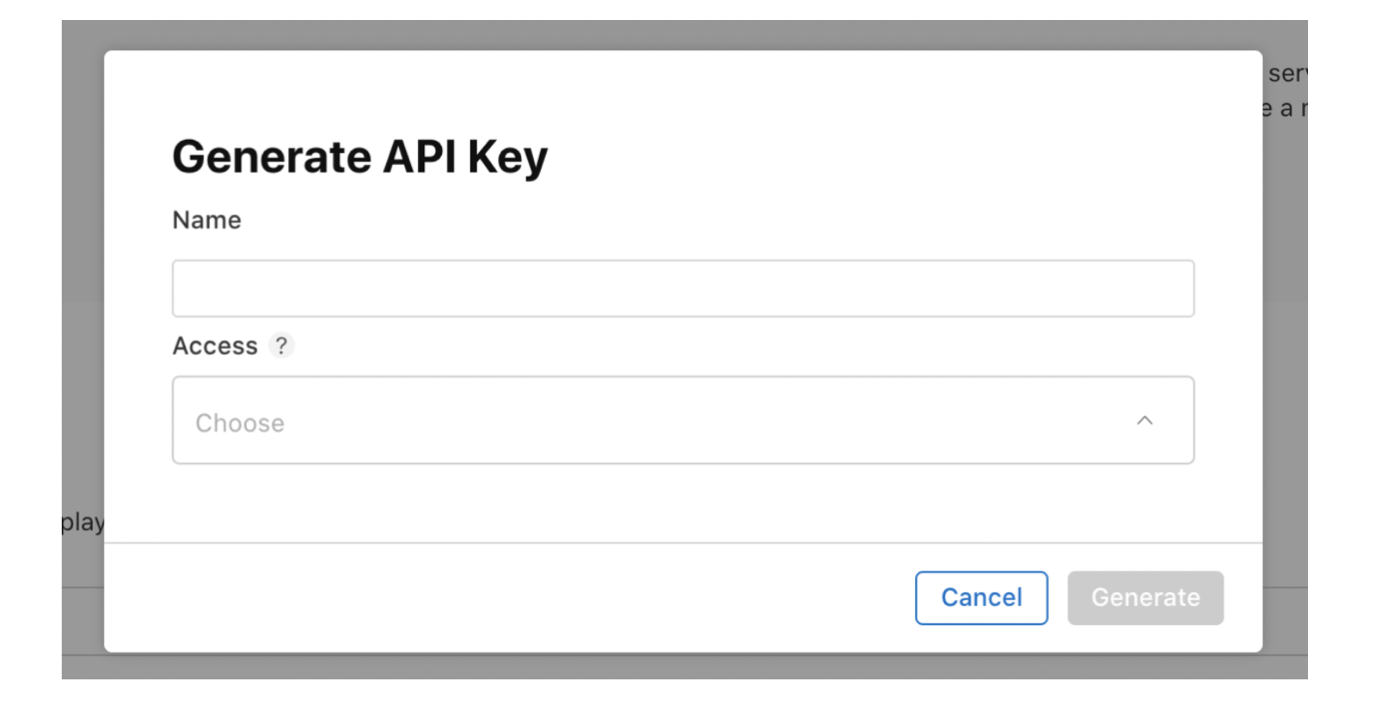
Under Access, select the role for the key. The roles that apply to keys are the same roles that apply to users on your team. Then click Generate.
The new key’s name, key ID, a download link, and other information will appear on the page. Please note that an API key’s access cannot be limited to specific apps.
Conclusion
Hopefully you now have a newfound or refreshed understanding of how the App Store submission process works, and of the common pitfalls that could lead to App Store review rejections! Following the guidelines discussed will improve your chances of getting speedy approvals consistently, and smart use of the App Store Connect API can help you spend less time thinking about and managing your release process, and more time building great apps.


