During a typical Android app development cycle, whenever you release or update your app you have to assemble the source code into an APK or App Bundle, which you then deploy to the Google Play Store. On its face, this may seem like a simple process, but a lot goes on behind the scenes: signing the package, updating app metadata, adding screenshots, checking descriptions, and updating changelogs among them. You must repeat this process every time you update your app, so these tasks add up.
The good news is you can automate these tasks, saving your time for new features and bug fixing. All you have to do is use fastlane. fastlane is an open-source set of tools designed to simplify Android and iOS deployment. These tools let you automate your release processes, saving you hours of developer time and reducing errors.
In this tutorial, we’ll learn how to build a local fastlane pipeline that will automate everything required to build and update an Android application so that it’s ready for the Google Play Store. You can find the final source code on GitHub, but as you follow along with this tutorial you’ll learn how to:
- Set up fastlane in your project
- Automatically take and save screenshots
- Distribute the app for beta testers
- Upload the app’s marketing materials and release notes
- Deploy the finished bundle to the Google Play Store
If you’re looking for a similar guide for iOS, check out my previous tutorial here.
Setting up fastlane
There are many ways to install fastlane, but for this tutorial, we’ll use Ruby.
You must have Ruby installed on your machine. To confirm that this is the case, open your terminal and run:
ruby -v
If Ruby is not installed, follow the instructions here to add it.
To install fastlane, run the following command in your terminal:
sudo gem install -n /usr/local/bin fastlane --verbose
When the installation completes, confirm it by running the following command:
fastlane --version
# Output:
fastlane installation at path:
/usr/local/Cellar/fastlane/2.185.0/libexec/gems/fastlane-2.185.0/bin/fastlane
-----------------------------
[✔] 🚀
fastlane 2.185.0
Now you’re ready to use fastlane for your next Android project. Let’s configure some of the basic options you’ll need to get started.
Configuring fastlane for an Android project
To add fastlane to an existing project, go to your project’s root directory and enter:
fastlane init
Next, enter your app’s unique package name. This package name will be stored in fastlane for future tasks.
The terminal prompt will then ask for the path to your service account JSON file, but we’ll handle that later in the tutorial, so press Enter to skip it for now.
Next, fastlane will ask if you plan on uploading metadata, screenshots, and builds to Google Play. You can either create brand new app metadata and screenshots or download the existing metadata if your app has already been submitted. For now, press n to skip this step, as we’ll set it up later in the tutorial.
When the installation is finished, you will see a new directory called <code>fastlane<code> that contains:
- Appfile - contains your package and signing information
- Fastfile - contains automation configurations and lanes


Understanding fastlane actions and lanes
fastlane stores automation configurations in the Fastfile where it groups different actions into lanes. These lanes represent different release processes, and the actions are steps taken within each lane.
A lane starts with <code>lane:name<code> and then includes an optional description in the <code>desc<code> field. Open your Fastfile, and you will see:
default_platform(:android)
platform :android do
desc "Runs all the tests"
lane :test do
gradle(task: "test")
end
desc "Submit a new Beta Build to Firebase App Distribution"
lane :beta do
gradle(task: "clean assembleRelease")
firebase_app_distribution
# sh "your_script.sh"
# You can also use other beta testing services here
end
desc "Deploy a new version to Google Play"
lane :deploy do
gradle(task: "clean assembleRelease")
upload_to_play_store
end
end
As you can see, there are already three lanes inside the file: test, beta, deploy.
- test - Runs all the tests for the project using the Gradle action
- beta - Submits a beta build using the Gradle and firebase_app_distribution actions.
- deploy - Deploys a new public release to the Google Play Store using gradle and upload_to_play_store actions.
In the rest of this tutorial, we’ll see how to fill in details for each of these lanes to build your app, create screenshots, and ultimately submit the app to the Google Play Store for distribution.
Building your app with fastlane
fastlane’s Gradle action can run any Gradle-related tasks, including building and testing your Android app. As you’ll see in the following sections, you can configure the Gradle action to suit the type of build you’re trying to run.
Build types
When you create a new Android project, you get two build types: <code>debug<code> and <code>release<code>. You can add the appropriate configuration to each build type to add or change specific preferences for each.
To define your build types, add the following to your Fastfile:
buildTypes {
debug {
applicationIdSuffix ".debug"
debuggable true
}
release {
signingConfig signingConfigs.release
minifyEnabled true
proguardFiles getDefaultProguardFile('proguard-android-optimize.txt'), 'proguard-rules.pro'
}
}
This includes options to make sure the debug build stands out (with a suffix), and it ensures the release build is minified, signed, and Proguard rules are applied. Any of the Android build system configuration options can be added to your fastlane build options.
Product flavors
Product flavors give you additional options for Android build variants. Add the following to create two product flavors (<code>demo<code> and <code>full<code>) to your app:
flavorDimensions "version"
productFlavors {
create("demo") {
dimension = "version"
applicationIdSuffix = ".demo"
versionNameSuffix = "-demo"
}
create("full") {
dimension = "version"
applicationIdSuffix = ".full"
versionNameSuffix = "-full"
}
}
Incrementing version code
Version code determines whether the current build version is more recent than another, so it’s a critical component of your app update and maintenance strategy. You must increase the value of your <code>version code<code> with each release to indicate changes.
If you’re not using fastlane, you have to manually update your <code>version code<code> in your <code>build.gradle<code> file every time you make an update. Versioning is much easier with fastlane; you simply need to add the plugin shown below:
fastlane add_plugin increment_version_code
Once the plugin is installed, open your Fastfile and add a lane to increment the <code>version code<code> automatically:
desc "Increment version code"
lane :increment_vc do
increment_version_code(
gradle_file_path: "./app/build.gradle",
)
Next, run the lane in your Terminal:
fastlane increment_vc
Once the command runs, your <code>version code<code> inside the <code>build.gradle<code> file will be incremented. You can add this lane for every build going forward, thus removing the need to manually update your app’s version number every time you submit a release.
Configuring the Build lane
Now that you’ve added build types, flavors, and versioning to your project, you can run them by adding the following to your <code>build<code> lane:
desc "Build"
lane :build do
gradle(
task: "assemble",
flavor: "demo",
build_type: "Release"
)
end
To build the app, run:
fastlane build
fastlane will clean and assemble the app, building only the <code>release<code> build type. App signing will be done according to the declaration in the <code>release<code> closure. Later in this tutorial, we’ll configure a signing key, so you can skip this part for now.
If your app build succeeded, you will see the following message:
[13:37:40]: fastlane.tools finished successfully 🎉
With one major task down, let’s take a look at how you can automate your screenshot process in fastlane.
Automating screenshots with screengrab
Fastlane uses screengrab to automatically generate localized screenshots of your Android app across dozens of device types. Taking hundreds of screenshots like this manually would take hours, so this could be a huge win for your team.
Before proceeding with the automation, you need to add the following permissions to your src/debug/AndroidManifest.xml:
<!-- Allows unlocking your device and activating its screen so UI tests can succeed -->
<uses-permission android:name="android.permission.DISABLE_KEYGUARD" />
<uses-permission android:name="android.permission.WAKE_LOCK" />
<!-- Allows for storing and retrieving screenshots -->
<uses-permission android:name="android.permission.WRITE_EXTERNAL_STORAGE"
tools:ignore="ScopedStorage" />
<uses-permission android:name="android.permission.READ_EXTERNAL_STORAGE" />
<!-- Allows changing locales -->
<uses-permission
android:name="android.permission.CHANGE_CONFIGURATION"
tools:ignore="ProtectedPermissions" />
With the required permissions in place, you can use the instrumentation testing toolchain to set up screenshot automation.
Before you begin, open app/build.gradle and add the following <code>dependencies<code>:
testImplementation 'junit:junit:4.13.2'
androidTestImplementation 'androidx.test.ext:junit:1.1.2'
androidTestImplementation 'androidx.test.espresso:espresso-core:3.3.0'
androidTestImplementation 'androidx.test:rules:1.4.0'
androidTestImplementation 'tools.fastlane:screengrab:2.0.0'
Your project may already have some of these dependencies, so adjust accordingly.
Next, inside the <code>defaultConfig<code> block, add <code>testInstrumentationRunner<code>:
testInstrumentationRunner 'androidx.test.runner.AndroidJUnitRunner'
After you sync Gradle, you can move on to configuring your instrumentation tests.
Configuring instrumentation tests
Find or create an instrumentation test class named <code>ExampleInstrumentedTest<code> inside your project’s <code>app/src/androidTest/<code> folder.
Next, implement the test function by adding the following:
package com.devplanet.myavatar
import androidx.test.espresso.Espresso
import androidx.test.espresso.action.ViewActions
import androidx.test.espresso.assertion.ViewAssertions
import androidx.test.espresso.matcher.ViewMatchers
import androidx.test.platform.app.InstrumentationRegistry
import androidx.test.ext.junit.runners.AndroidJUnit4
import androidx.test.rule.ActivityTestRule
import org.junit.Test
import org.junit.runner.RunWith
import org.junit.Assert.*
import org.junit.Rule
import tools.fastlane.screengrab.Screengrab
import tools.fastlane.screengrab.UiAutomatorScreenshotStrategy
import tools.fastlane.screengrab.locale.LocaleTestRule
/**
* Instrumented test, which will execute on an Android device.
*
* See [testing documentation](http://d.android.com/tools/testing).
*/
@RunWith(AndroidJUnit4::class)
class ExampleInstrumentedTest {
// JVMField needed!
@Rule
@JvmField
val localeTestRule = LocaleTestRule()
@get:Rule
var activityRule = ActivityTestRule(MainActivity::class.java, false, false)
@Test
fun testTakeScreenshot() {
activityRule.launchActivity(null)
//prepares to take a screenshot of the app
Screengrab.setDefaultScreenshotStrategy(UiAutomatorScreenshotStrategy())
Espresso.onView(ViewMatchers.withId(R.id.generateButton))
.check(ViewAssertions.matches(ViewMatchers.isDisplayed()))
//Takes screenshot of the first screen
Screengrab.screenshot("myAvatar_before_click")
//Trigger the generate button onClick function
Espresso.onView(ViewMatchers.withId(R.id.genrateButton))
.perform(ViewActions.click())
//Takes another screenshot
Screengrab.screenshot("myAvatar_after_click")
}
@Test
fun useAppContext() {
// Context of the app under test.
val appContext = InstrumentationRegistry.getInstrumentation().targetContext
assertEquals("com.devplanet.myavatar", appContext.packageName)
}
}
With the instrumentation test in place to capture the screenshot, you can set up screengrab and then a lane to automate the screenshot generation process.
Installing screengrab
To install screengrab, add the Ruby gem:
sudo gem install screengrab
Next, initialize screengrab by running the following inside your project:
fastlane screengrab init
To run screengrab, you need <code>-debug.apk<code> and <code>-debug-AndroidTest.apk<code>, but you can generate them automatically by building your project with the <code>./gradlew assembleDebug assembleAndroidTest<code> Gradle task. After a successful build, you can find both the APKs inside the project’s <code>/app.build/outputs/apk/<code>.
Next, find the <code>Screengrabfile<code> inside your <code>fastlane<code> directory. Open the Screengrabfile and replace its contents with the following:
# Set the path to the Android SDK
android_home('$PATH')
# Start ADB in root mode, giving you elevated permissions to write to the device
use_adb_root(true)
# Your project’s package name
app_package_name('com.devplanet.myavatar')
# Paths for APK files, which you are creating via fastlane
app_apk_path('app/build/outputs/apk/debug/app-debug.apk')
tests_apk_path('app/build/outputs/apk/androidTest/debug/app-debug-androidTest.apk')
# Locations where you want to create screenshots. Add locales as required.
locales(['en-US', 'fr-FR', 'it-IT'])
# Clears all previously generated screenshots before creating new ones
clear_previous_screenshots(true)
screengrab is now configured, so once you add it to a lane, fastlane will be able to automatically capture and store screenshots of your app.
Adding a lane
Open your Fastfile and add a new lane to create screenshots:
desc "Build debug, test APK for screenshots and grab screenshots"
lane :grab_screens do
gradle(
task: 'clean'
)
gradle(
task: 'assemble',
build_type: 'Debug'
)
gradle(
task: 'assemble',
build_type: 'AndroidTest'
)
screengrab
end
To run this lane and create new screenshots, use the following command:
fastlane grab_screens
This will start the screenshot-grabbing process. When the execution is completed, it will open the screenshots in your browser, but you can also find them inside the <code>/fastfile/metadata/<code> directory. Later in this tutorial, you’ll see how to upload these screenshots (with all your metadata) to the Google Play Store for distribution.
Beta app distribution with fastlane
Before you distribute updates of your app to production users, you may want to share them with beta testers to get feedback. To do that, you can upload your Android app to an app distribution provider. fastlane supports beta app deployment with multiple beta app providers, including Google Play and Firebase App Distribution.
In this tutorial, I’ll show you how to distribute your beta app with Firebase App Distribution, which includes distribution and user management features for Android apps.
Using the Firebase CLI
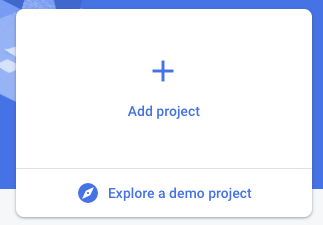
To get started, you have to add your project to Firebase.
After logging in, create a new project by clicking on Go to Console at the top right of your screen. Next, create a new Firebase project by clicking on Add project:
Name the project and continue. Once the project creation is complete, you can click on continue to view the project’s console.
Fastlane uses the Firebase CLI to upload your builds to Firebase App Distribution. Follow the instructions here to install Firebase CLI on your OS.
After the installation is complete, sign in to your Firebase account using the command below:
firebase login
Before you continue, you also need to install the Firebase fastlane plugin:
fastlane add_plugin firebase_app_distribution
Press y to allow fastlane to modify your Gemfile and continue.
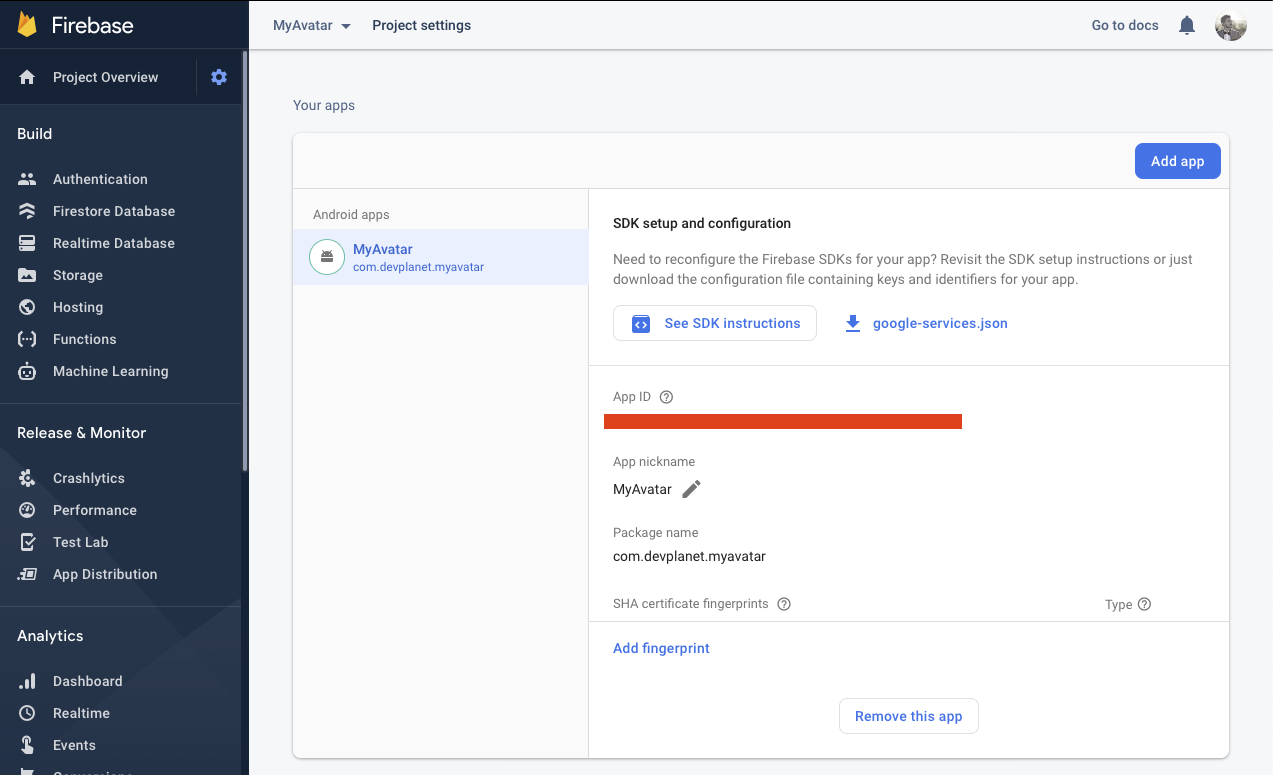
After installing the plugin, you need to add Firebase to your Android app. Follow these steps to add Firebase to your project. Once Firebase is added, open the General Settings page and save your App ID so you can add it to your project’s configuration later.
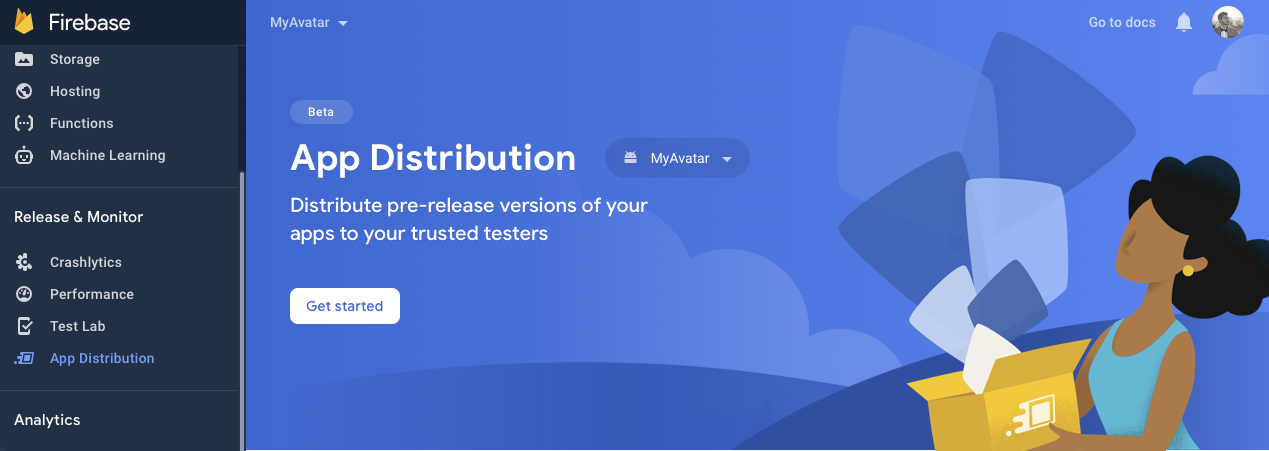
Now you can create beta user groups and release your app to them before distributing to a wider audience in the Google Play Store. To create a user group, navigate to the App Distribution tab and press Get Started:
Go to the Testers and Groups tab and create a group. You can name it group-one.
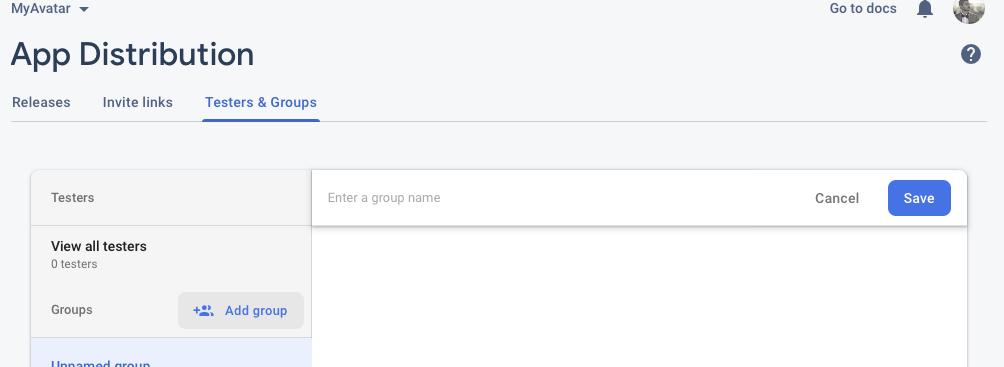
Finally, add testers. Make sure you enter your own email to add yourself as a tester so you can try this out. Once that’s done, you are ready to upload your first beta build with fastlane.
Deploying for beta testing
Open your Fastfile and replace the <code>beta<code> lane with the following. Remember to replace <code><YOUR_FIREBASE_APP_ID><code> with the App ID you copied previously:
desc "Submit a new Beta Build to Firebase App Distribution"
lane :beta do
build
firebase_app_distribution(
app: "<YOUR_FIREBASE_APP_ID>",
groups: "group-one",
release_notes: "Lots of new avatars to try out!"
)
end
The above <code>beta<code> lane will upload your build to the group-one test group. From your terminal, run the <code>beta<code> lane with fastlane:
fastlane beta
# Output:
[19:38:15]: 🔐 Authenticated successfully.
[19:38:18]: ⌛ Uploading the APK.
[19:38:33]: ✅ Uploaded the APK.
[19:38:35]: ✅ Posted release notes.
[19:38:37]: ✅ Added testers/groups.
[19:38:37]: 🎉 App Distribution upload finished successfully.
------
[19:38:37]: fastlane.tools finished successfully 🎉
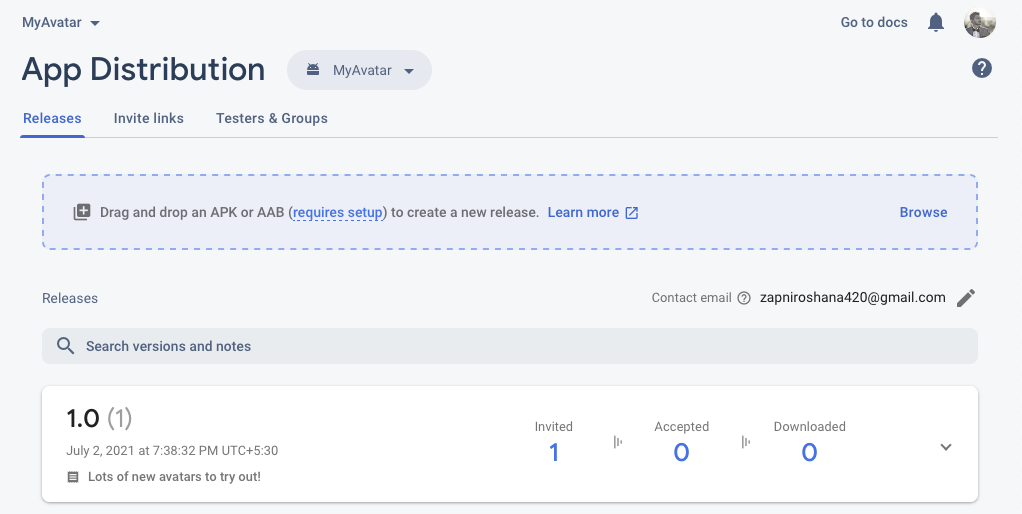
Navigate to Firebase App Distribution to ensure that the new build is available in your console:
The users in your test group also will receive an email with instructions:
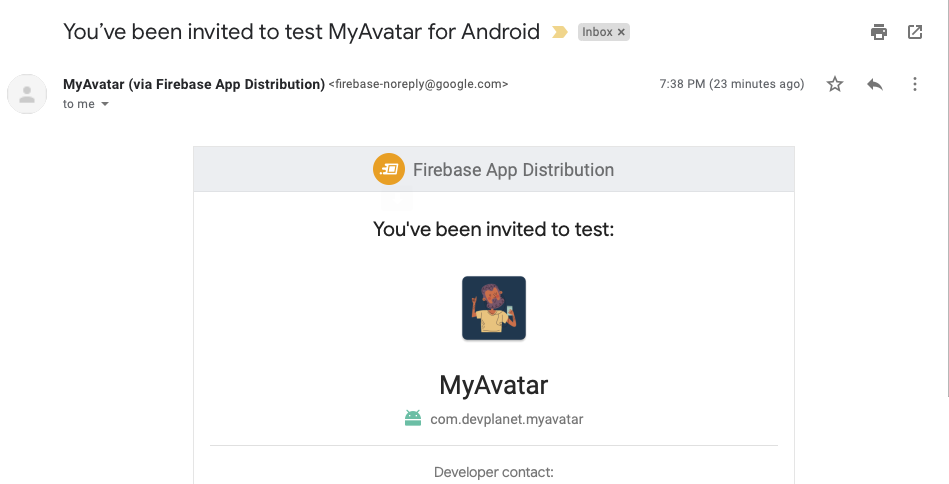
Congratulations! You deployed your beta build to testers with fastlane.
Next time, you can make beta updates with a single command from your terminal, or you can hook this command into your continuous integration workflow to completely automate the process.
Releasing to the Play Console
The last task we’re going to automate is releasing a new version of your app to users through the Google Play Store. Before you complete these steps, you’ll need to get a Google Play account (which you can sign up for here).
Fastlane uses the supply action to upload app metadata, screenshots, and binaries to Google Play. supply needs to have at least one previous version of your app uploaded to the Google Play Store before you run it because fastlane cannot create a completely new app in the Play Store. But after you’ve created your app manually the first time, fastlane can completely automate the update process, as you’ll see below.
Creating and signing your app
You can follow the steps on the official Play Console Help page to create and set up your app for the first time. Once you have created your app in the Play Console, upload it to one of the available tracks so that Play Console knows your app’s package name. You don’t need to actually publish the app if you’re not ready to do so yet.
Next, Android requires that all APKs or app bundles be digitally signed with a certificate before they are uploaded to Play Console. If you haven’t generated an upload key for your app yet, you can follow the steps here to create one.
Once you have your key, best practice is to remove signing information from your build files so it is not easily accessible to others. To do this, create a separate properties file to store that information, as you will refer to this in your build files.
Navigate to your app’s <code>build.gradle<code> file and add the following. Be sure to add a reference to the key.properties file inside <code>build.gradle<code> before the <code>android<code> block:
def keystoreProperties = new Properties()
def keystorePropertiesFile = rootProject.file('key.properties')
if (keystorePropertiesFile.exists()) {
keystoreProperties.load(new FileInputStream(keystorePropertiesFile))
}
Now, you can configure a single signing configuration for your release build type:
signingConfigs {
release {
keyAlias keystoreProperties['keyAlias']
keyPassword keystoreProperties['keyPassword']
storeFile keystoreProperties['storeFile'] ? file(keystoreProperties['storeFile']) : null
storePassword keystoreProperties['storePassword']
}
}
buildTypes {
release {
signingConfig signingConfigs.release
minifyEnabled false
proguardFiles getDefaultProguardFile('proguard-android-optimize.txt'), 'proguard-rules.pro'
}
}
Once you have completed your signing configuration, Gradle will automatically sign each release when it’s built.
Building the Android app bundle
Currently, Android App Bundles are preferred over APKs. fastlane supports both, but you’ll need to update your Fastfile to build the app bundle for you.
To do so, add the following lane:
desc "Build release app bundle"
lane :build_bundle do
gradle(task: "clean bundleRelease")
end
Next, execute the lane:
fastlane build_bundle
Once the execution is completed, you can find your bundle in the app’s build directory (the default location is <code>app/build/outputs/bundle/release<code>). Now you have an app bundle file that is ready to upload to the Google Play Console. While you’ll automate subsequent releases with fastlane, you have to upload this first build manually.
Go to Play Console, select the Production track, and create a release.
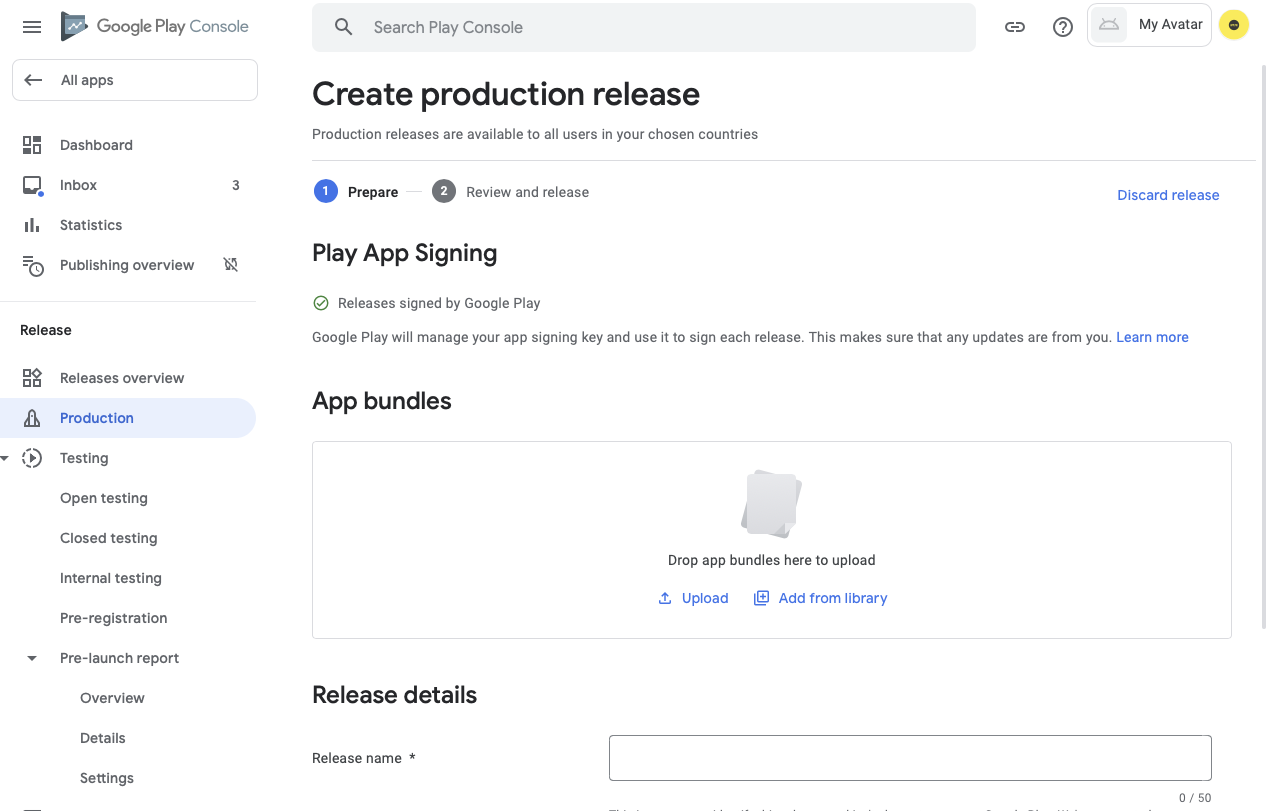
You can enable Play App Signing and upload the app-release.aab bundle file you previously created. Since this is the first upload of your app, you can provide a short description of it in Release notes.
Tap on save and navigate to All apps where your list of apps appears. Your new app will be available with your package name.
With your first build manually uploaded to the Play Store, you are ready to automate this process with fastlane for future updates.
Creating Play Console credentials
To connect fastlane with Play Console, you need to provide appropriate credentials in the form of an API key file. This file contains the credentials that fastlane will use to connect to your Google Play Console account and make updates on your behalf.
To create a key file, follow these steps from the fastlane official documentation. Once your key file is created, you can connect fastlane with your Google Play Console APIs.
Run this command to verify your API key file:
fastlane run validate_play_store_json_key json_key:/path/to/your/downloaded/file.json
Next, add your key file to fastlane. Open the <code>fastlane/Appfile<code> and update the <code>json_key_file<code> property with your key file location. In this tutorial, it is located inside the root directory of your project:
json_key_file("./api-key.json")
Updating metadata
With the key file in place, you should be able to run supply to push the latest version of your app to the Google Play Store. Using an automated process like the one below is the best way to keep your metadata up-to-date with every release.
First, download your app’s existing metadata from the Play Store by running the following command. (Note: If you followed the previous steps on creating screenshots, you’ll already have a screenshot directory created. Remove that folder before initializing supply, as it will replace it the first time it runs.)
fastlane supply init
fastlane will download any existing content and put it into the <code>fastlane/metadata/android<code> directory. Next time you update your app’s metadata, you’ll only need to update these local files — supply will take care of the rest.
For example, to upload screenshots, first run the lane you created previously to generate screenshots:
fastlane capture_screen
Now, you will see your screenshots in <code>metadata/android/en-US/images/phoneScreenshots<code>. Run the following to upload your new screenshots:
fastlane supply --skip_upload_changelogs
The <code>--skip_upload_changelogs<code> property skips uploading changelogs so you do not have to increment your app’s version code when updating only metadata.
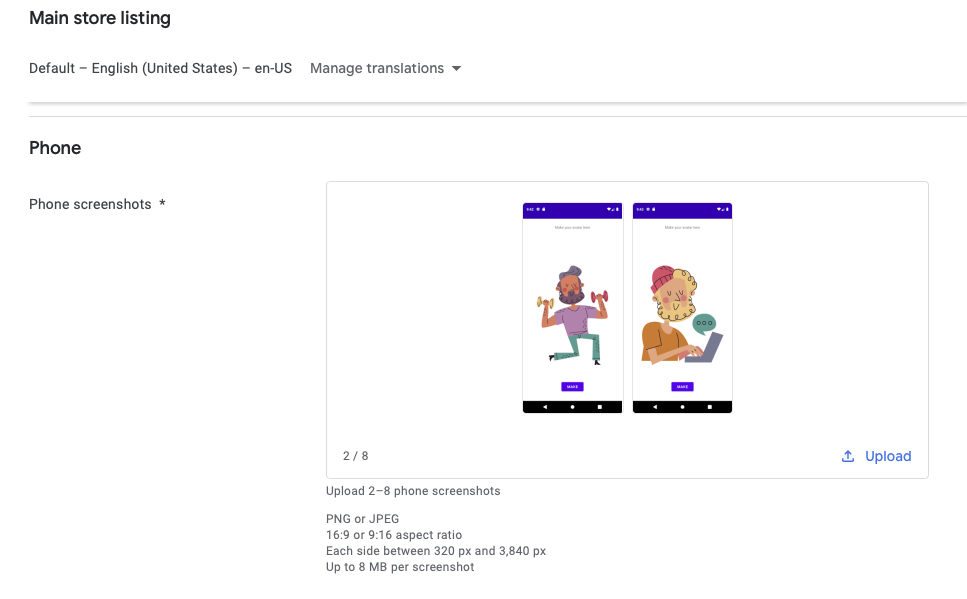
When the command runs successfully, navigate to the Play Console. On your app’s Main Store listing, you’ll see the screenshots:
You have now configured fastlane to retrieve and update app metadata, so the final step is to upload a release build to the Google Play Store.
Deploying to the Google Play Store
In the previous section, you created an Android App Bundle and uploaded it to the Play Console manually. From now on, you can do that automatically by running a single command on your Terminal.
First, update the <code>deploy<code> lane inside your Fastfile:
desc "Deploy a new version to the Google Play"
lane :deploy do
# The lane you created previously to increment your app’s `version code`.
increment_vc
# The build release app bundle lane you created previously.
build_bundle
# Uploads Android App Bundle to Play Console.
upload_to_play_store(release_status:"draft")
end
The <code>release_status<code> property is used to maintain the status of the APKs or AABs when uploaded. (You can read about more parameters available for the supply action.)
Run <code>fastlane deploy<code>, and fastlane will take care of everything for your new release. When the command completes, your new build will appear in the Play Console.
Conclusion
In this tutorial, we’ve built a complete fastlane pipeline for Android app deployment. Hopefully you’ve seen how it can save you time over building, testing, and releasing apps manually. As you scale up your app development team and release efforts, automation tools become increasingly important, to prevent errors and ensure that no single team member becomes a bottleneck in the release process. Soon enough, your team will be spending more time building and iterating on your app instead of worrying about manual release tasks!


