Building and uploading an iOS app from Xcode is a task almost every iOS developer performs at least once in their career. For many indie developers and small teams, this manual approach can indefinitely remain a perfectly acceptable way to prepare a binary for App Store distribution. But, as team size grows or the quality bar raises, this way of building and shipping becomes increasingly unsustainable. Making sure other developers on the team have the right environment, tools, and code signing certificates on their own machines can be tedious, and even small differences between the environments on two developer’s machines can have disastrous consequences, especially in situations where time is of the essence. For these reasons, most growing mobile teams recognize that CI/CD is critical for scaling their dev and release process. Having a robust CI/CD workflow in place increases confidence in the process, and helps ensure reliability and consistency across releases.
These days, there are lots of CI/CD providers to choose from, and figuring out where to start can be daunting. At Runway, our team has lots of experience with many of the popular CI/CD solutions out there, so we’ve set out to make things easier for developers and teams looking to get started with — or migrate their — CI/CD. By providing concrete, step-by-step tutorials, we hope to get you from zero to having a fully functional build & upload pipeline without any pain. Our first tutorial covered GitHub Actions, and now we’re turning our attention to Bitrise.


A quick intro on Bitrise
Bitrise is one of a few CI/CD providers that caters specifically to mobile app builds. It’s also unique in that it provides a user-friendly interface for configuring your workflows — a refreshing alternative to the ubiquitous (but often unwieldy and esoteric!) <code>.yml<code> file. Because of this, Bitrise can be an appealing choice for mobile developers looking to set up a standard CI/CD pipeline quickly and easily — in fact, you can create a complete build & deploy workflow on Bitrise without needing to write any code at all!
Hey — what about fastlane?
Many teams will turn to a tool like fastlane which, among other benefits, makes it possible to track changes to your build workflows and their unique configurations over time, through version control. fastlane also allows you to more easily migrate your workflows to another CI/CD provider if needed. But setting up and maintaining a fastlane Fastfile is a time investment, especially as your team and needs grow. Although Bitrise does have solid support for fastlane (via a fastlane Bitrise step), having it in place is not strictly necessary for setting up a complete (if basic) build & upload pipeline on Bitrise. So, if you’re short on time and motivation, Bitrise can be an attractive option.
In this tutorial, we’ll show you how to spin up a complete Bitrise iOS build & deploy workflow in just 30 minutes. By the end of the tutorial, you’ll have a fully functional workflow that builds your app and uploads iOS binaries to TestFlight on any push to a branch of your choosing.
Let’s get started!
Steps
- Create a Bitrise account & add a new app
- Configure your workflow
- Configure workflow triggers
- Kick off a build
Create a Bitrise account & add a new app

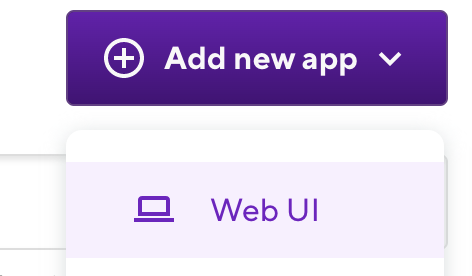
Bitrise will give you the option to set up your new app through their web app UI, or using their CLI. We’ll choose the web UI.
You’ll be taken through an app configuration flow that will hook up your new Bitrise app with your app’s version control repository. At the end of the configuration flow, you’ll have the option to register a webhook for your repo so that Bitrise can start a new build any time you push to the main branch you configure.
Bitrise will automatically create a starter workflow (called primary) and kick off your first build once you’ve finished the new app configuration flow.
Here’s what the workflow does out of the box:
- It clones your repo and checks out your configured main branch
- It builds your app and runs any tests
- It uploads any files resulting from the tests run to the workflow run’s Artifacts, where you can view and download them to your machine
For a basic CI workflow, that’s pretty good! But in order to build our app for App Store distribution and upload builds to TestFlight, we’ll need a workflow that does a bit more.
Configure your release workflow
Having a workflow that verifies that your app builds and your tests pass is a good thing to have set up on a development branch, but when you’re ready to distribute your app to the App Store, you’ll want a workflow that does a bit more than that. We’ll create a new workflow that will expand on our primary workflow to accomplish the tasks commonly needed to prepare for an App Store release: building, testing, then signing and uploading to TestFlight.
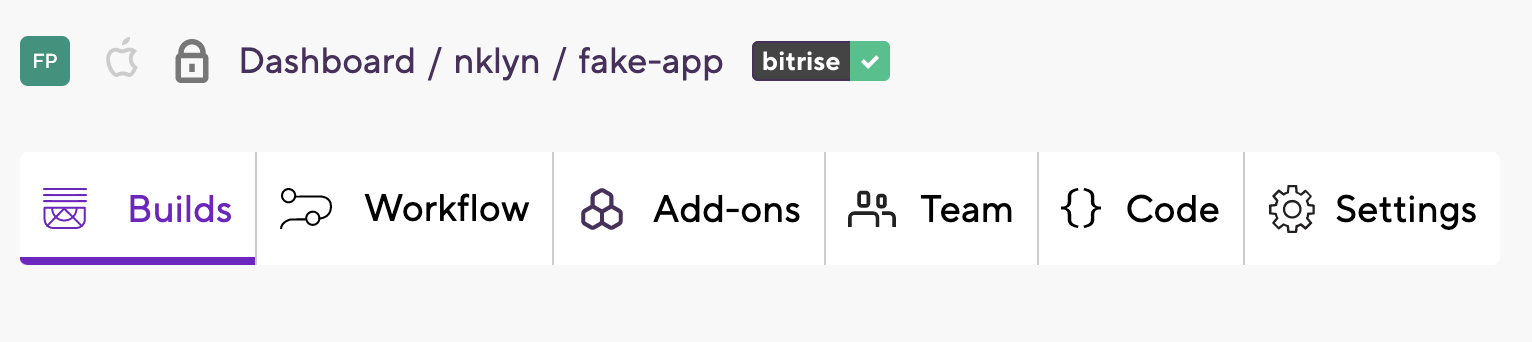
From your main app’s dashboard on Bitrise, navigate to the “Workflows” tab:
Click “Add new workflow”.
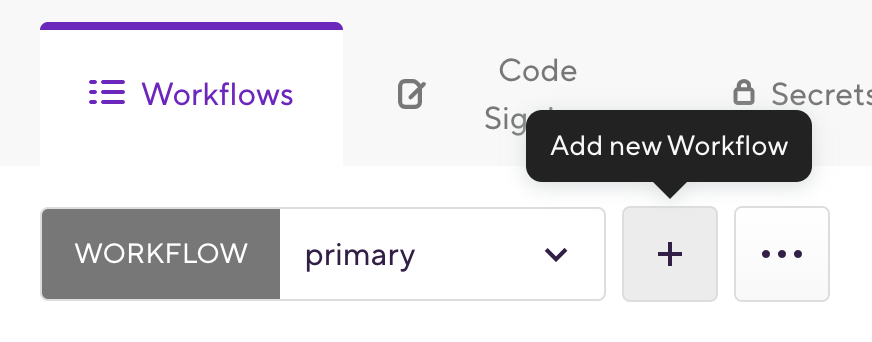
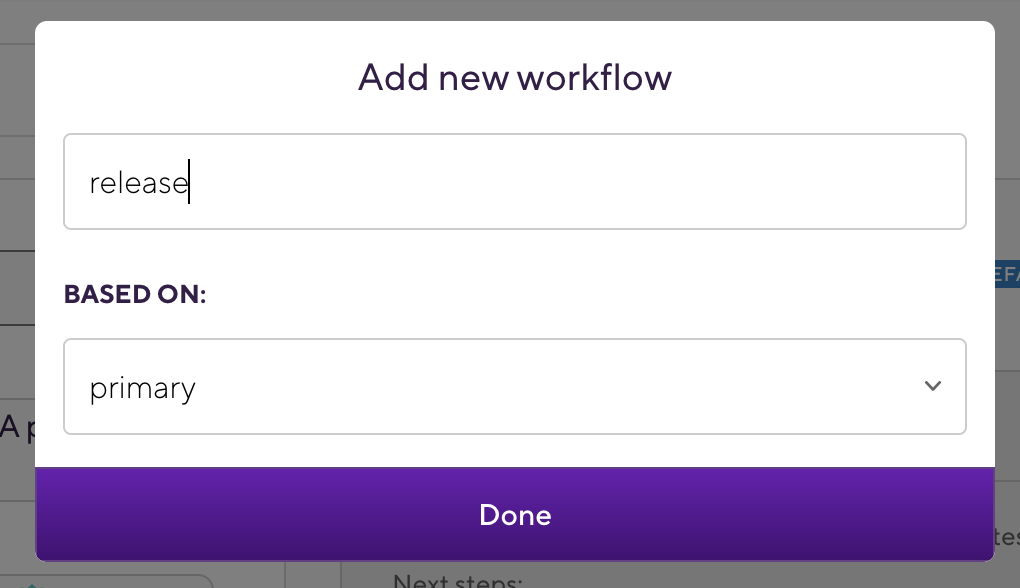
We’ll name our new workflow release, and we’ll base it off of our primary workflow. This will allow us to copy over some of the basic workflow functionality that we’ll be reusing.
Once the workflow is created, you’ll be placed in the workflow editor. In the workflow editor you can view and configure all of the steps that make up the workflow, and re-order them if needed.
Configure code signing and add an App Store Connect API key
Before we start adding steps to our release workflow, we’ll need to configure code signing and add an App Store Connect API Key to the workflow. Code signing will allow us to sign App Store builds within our Bitrise workflow, and adding an App Store Connect API key will enable Bitrise to use the official App Store Connect API to upload builds to TestFlight.
Switch to the “Code Signing” tab, and add your distribution signing certificate and private key pair (<code>.p12<code>) under the “Code signing certificates” section. Enter in a password for the certificate if one was set when you originally exported the certificate.
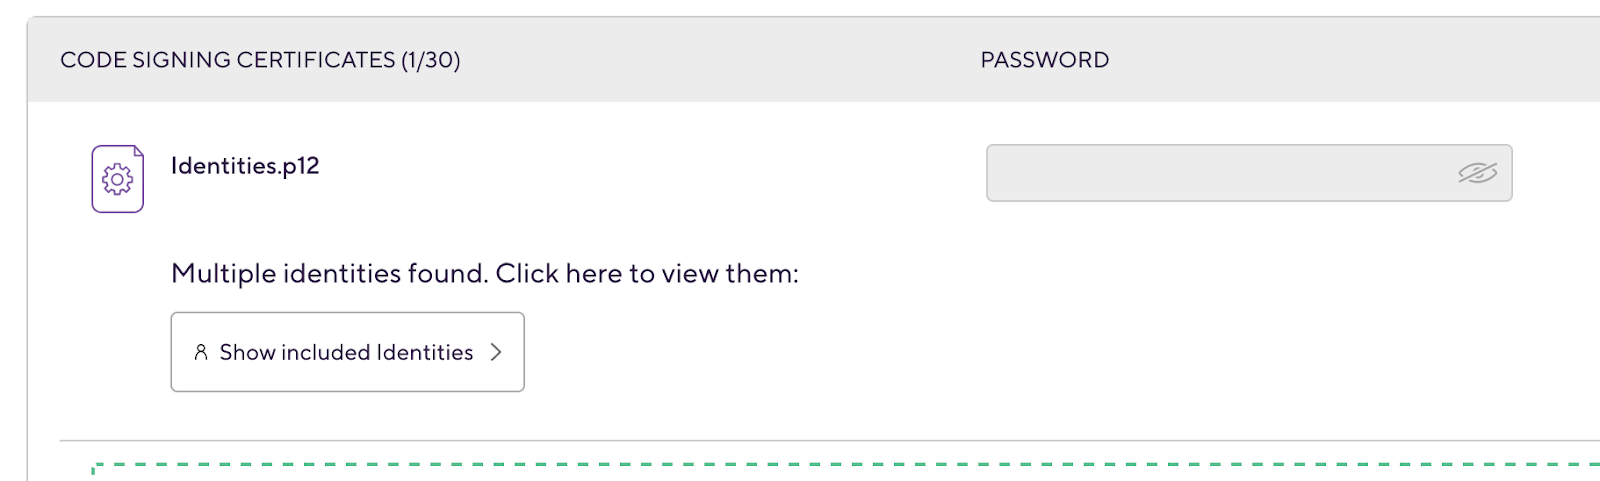
Note: You can skip adding a provisioning profile, since we’ll use one of Bitrise’s ready-made steps to download the correct provisioning profile directly from App Store Connect.
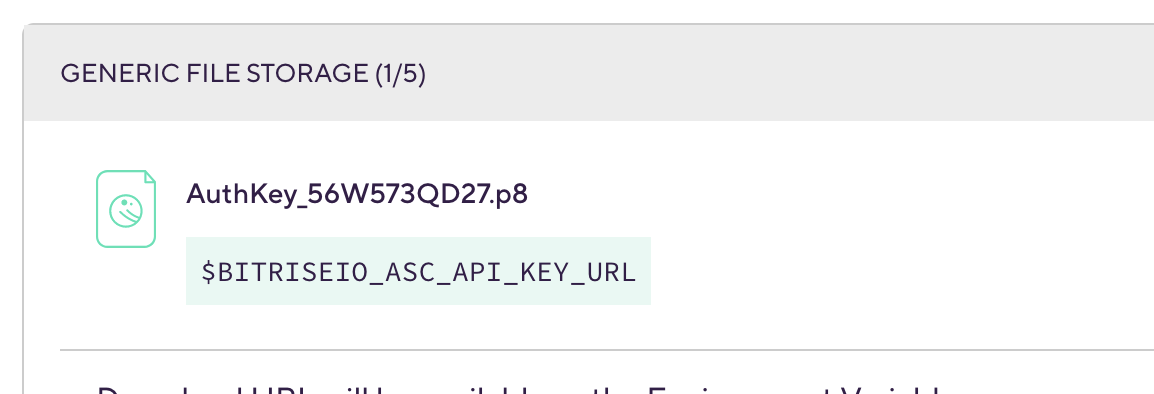
Next, we’ll add an App Store Connect API Key. If you need to create a new ASC API key, follow the steps outlined here. Once you have the API key (<code>.p8<code>), add it under the “Generic File Storage” section in the “Code Signing” workflow tab, and set the File Store ID field to <code>BITRISEIO_ASC_API_KEY_URL<code>. We’ll need this for one of our workflow steps later.
After adding your API key to the “Code Signing” tab, switch over to the “Secrets” tab. This is where we’ll add another important piece of information that goes together with the App Store Connect API key — the key’s “Issuer ID”. Add it as a secret environment variable with the name <code>ASC_API_ISSUER_ID<code>. You can choose whether or not to mark this secret env var “protected” — meaning the environment variable cannot be viewed, copied, or downloaded once saved. If you choose to make any secret environment variables protected, make sure you have a backup copy of the variable’s value, since you won’t be able to retrieve it in the future from Bitrise.

And that’s it for adding code signing and App Store Connect authentication to our workflow!
Next, we’ll want to set up some more environment variables that will come in handy when configuring our build and upload steps.
Configure environment variables
Bitrise will rely on a few configuration details to correctly execute the build and upload steps in our workflow, captured in the form of environment variables. You can scope environment variables to specific workflows, or add environment variables that will be available to all workflows for your Bitrise app. Navigate to the “Env vars” tab in the release workflow, and add the following env variables to the release workflow environment variables list:
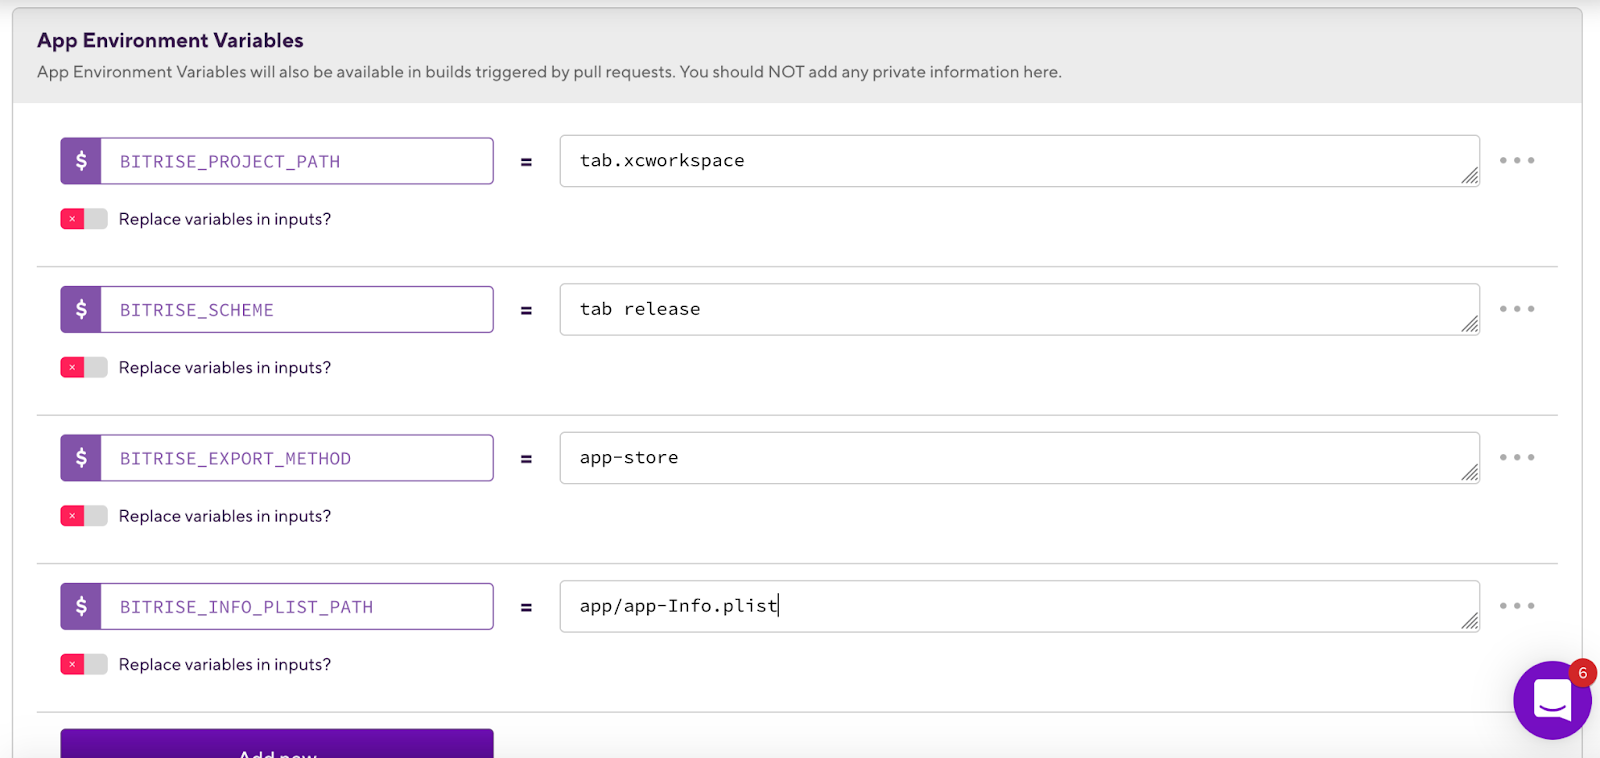
<code>BITRISE_PROJECT_PATH<code>: the path, relative to the root directory of your repo, to your <code>.xcodeproj<code> or <code>.xcworkspace<code>.
<code>BITRISE_SCHEME<code>: the shared scheme that you use to build your app for distribution.
<code>BITRISE_EXPORT_METHOD<code>: here enter <code>app-store<code>, since this workflow will be used to build and upload binaries to App Store Connect.
<code>BITRISE_INFO_PLIST_PATH<code>: the path, relative to the root directory of your repo, to your main target’s “Info.plist” file. This will be used to increment the project build number as part of the workflow.
With these workflow environment variables set up, we can start adding and configuring the steps required for our workflow to build and upload binaries to App Store Connect.
Add steps to the workflow
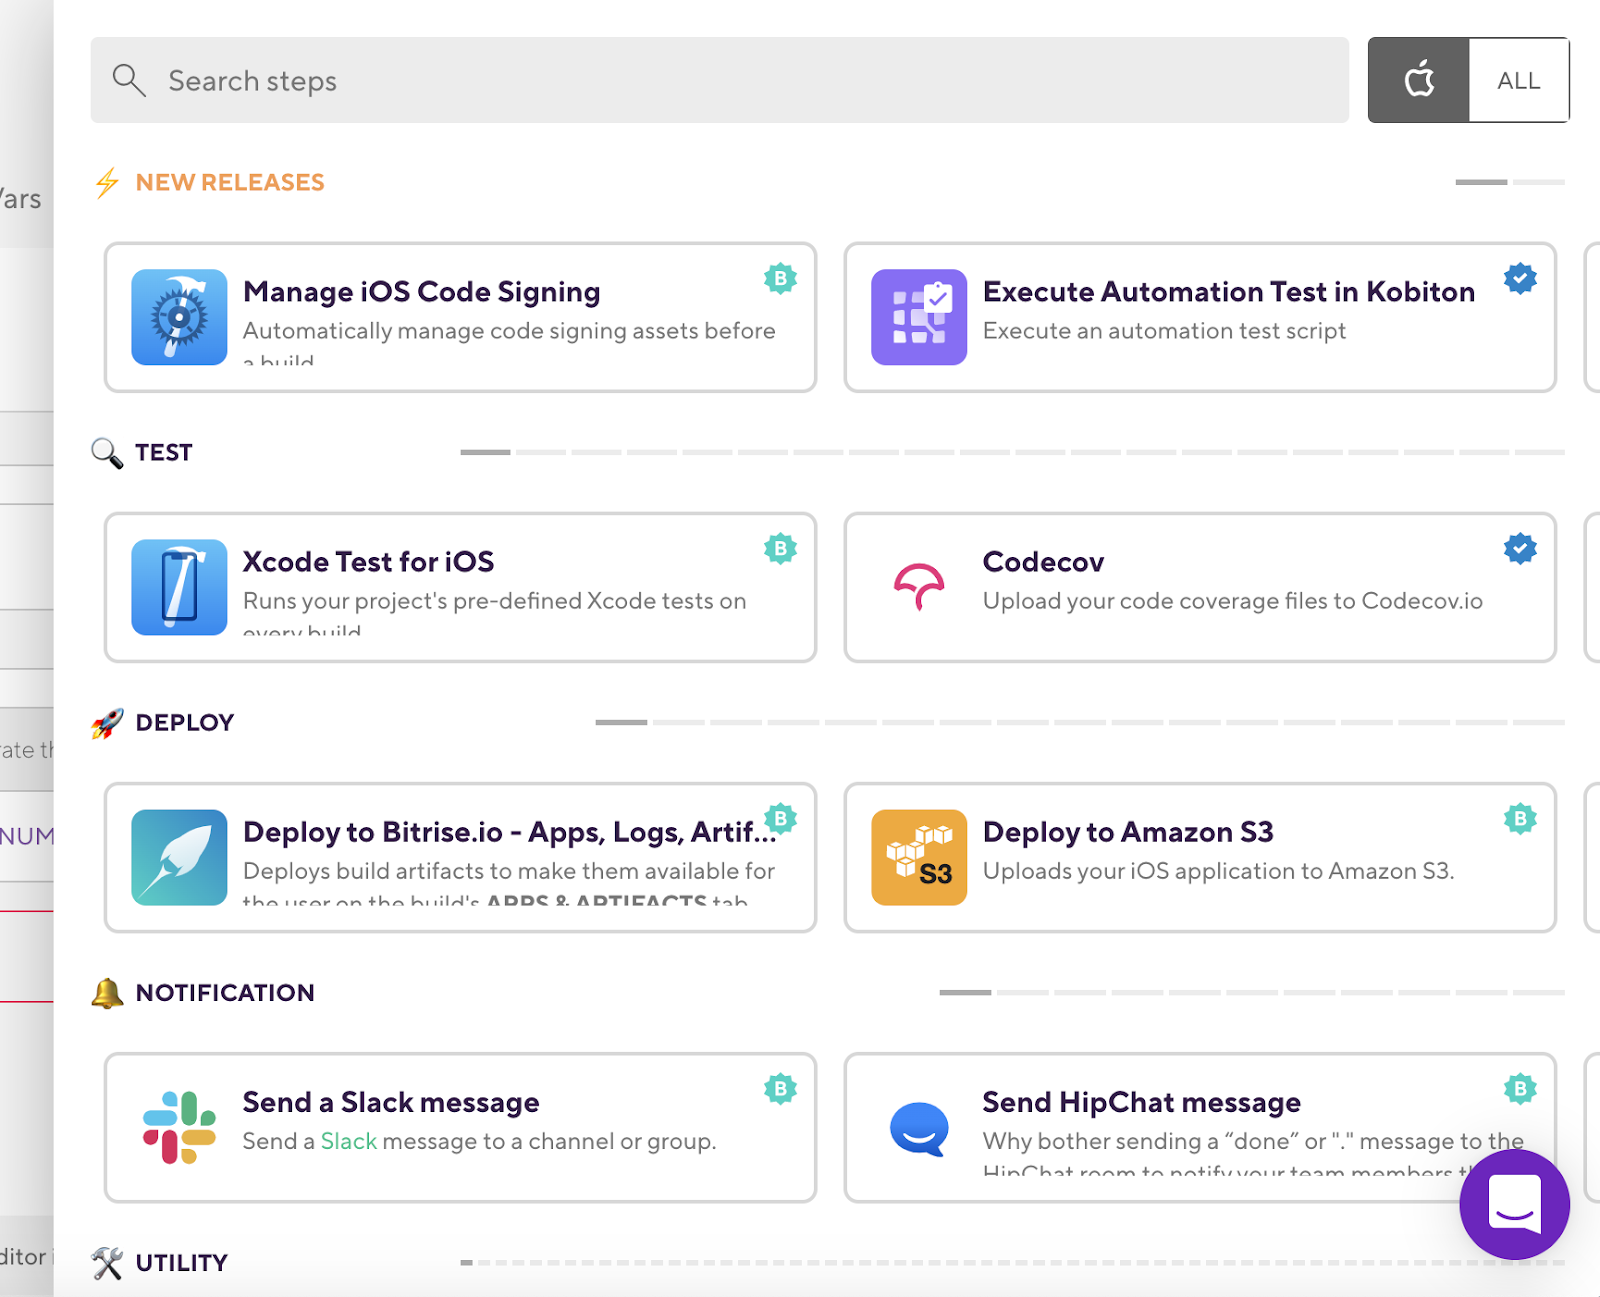
Switch back to the workflow editor and click the “+” after our “Xcode Test for iOS” step to add a step.
This will pull up the step search UI where you can browse available steps for your workflows.
Search for the step called “Set Xcode Project Build Number” and select it. Next we’ll set the required Input variables for the step. Under Info.plist file path, click “Insert variable” and select the <code>BITRISE_INFO_PLIST_PATH<code> environment variable we configured earlier. Under Build number you’ll notice the default is the <code>BITRISE_BUILD_NUMBER<code> environment variable. This is the build number of the Bitrise workflow run, and it will increment each time you run the Bitrise workflow, which makes it a good default option. If you need to offset the build number by some value, an option exists to do that as well.

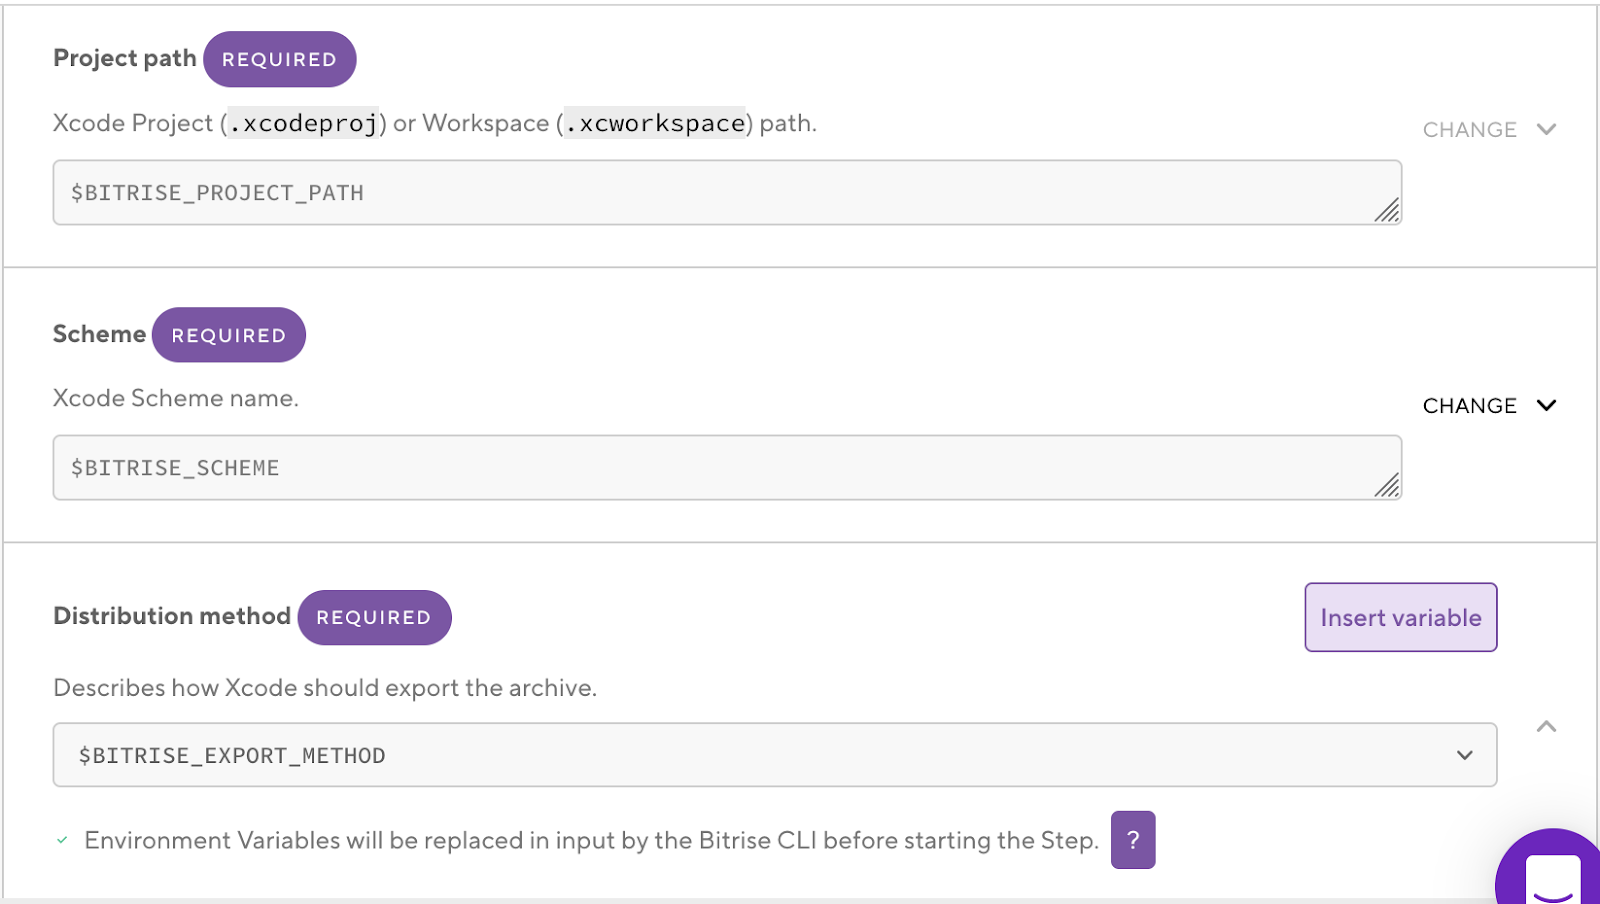
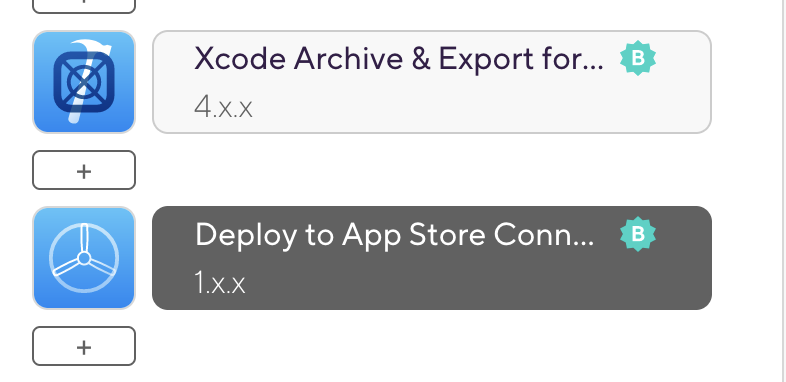
Next, add the “Xcode Archive & Export for iOS” step immediately after the “Set Xcode Project Build Number” step. This step will build our app for release, properly sign it using the correct signing certificate and provisioning profile, and create an <code>.ipa<code> file for upload to App Store Connect.
Under the Input variables section, the step will already have the <code>BITRISE_PROJECT_PATH<code> and <code>BITRISE_SCHEME<code> environment variables that were added to the environment variables for the workflow pre-populated. Update the “Distribution method” by clicking “Insert variable” and choosing the <code>BITRISE_EXPORT_METHOD<code> environment variable.
Next, open up the Automatic code signing section in the step.
Choose the “api-key” option for the Automatic code signing method field. This will tell Bitrise to use the App Store Connect API key we added to the “Code signing” section to download the correct provisioning profiles for our workflow during this step.
And that should be it for configuring the “Xcode Archive & Export for iOS” step!
Next, we’ll add a step to upload the resulting <code>.ipa<code> file to TestFlight.
Click the “+” button after the “Xcode Archive & Export for iOS”, and add the “Deploy to App Store Connect” step.
Under the input variables for the step, change the “Bitrise Apple Developer Connection” to “api-key”. As before, this will allow Bitrise to use the App Store Connect API key we added to the “Code signing” tab to authenticate with the App Store Connect API when uploading binaries to TestFlight.
The API Key: URL field should already be correctly populated with the <code>BITRISEIO_ASC_API_KEY_URL<code> environment variable. On the next field, API Key: Issuer ID, insert the <code>ASC_API_ISSUER_ID<code> secret environment variable.

The rest of the fields on the step can be left as they are.
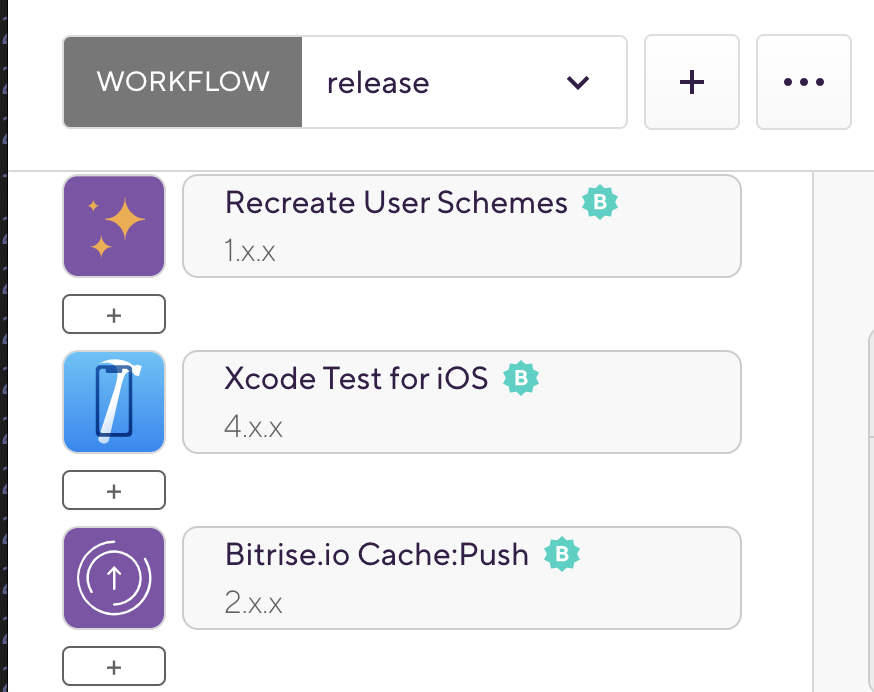
After all that, what you should have is a workflow called release, that has the following steps in this order:
- Activate SSH key
- Git clone repository
- Bitrise.io Cache:Pull
- Set Xcode Project Build Number
- Xcode Archive & Export for iOS
- Deploy to App Store Connect
- Bitrise.io Cache:Push
- Deploy to Bitrise.io: Apps, Logs, Artifacts
Next, we’ll configure the triggers that will start our new release workflow, and then we’ll give it a spin.
Configure workflow triggers
Navigate to the “Triggers” tab in the release workflow to view a list of triggers configured for your Bitrise app. Triggers are special events that cause a workflow to run against a specific branch. Some common triggers include pushing to a branch, opening a pull request against a branch, and creating a tag. Triggers are a great way to automate the kickoff event for builds.
Let’s add a push trigger on branches with the pattern <code>release-*<code> – meaning pushes to any branches that start with `release-` will trigger our workflow.

With this trigger set up, pushes to release branches will automatically trigger our new release workflow, building the app and uploading an IPA to App Store Connect!
Kick off a build
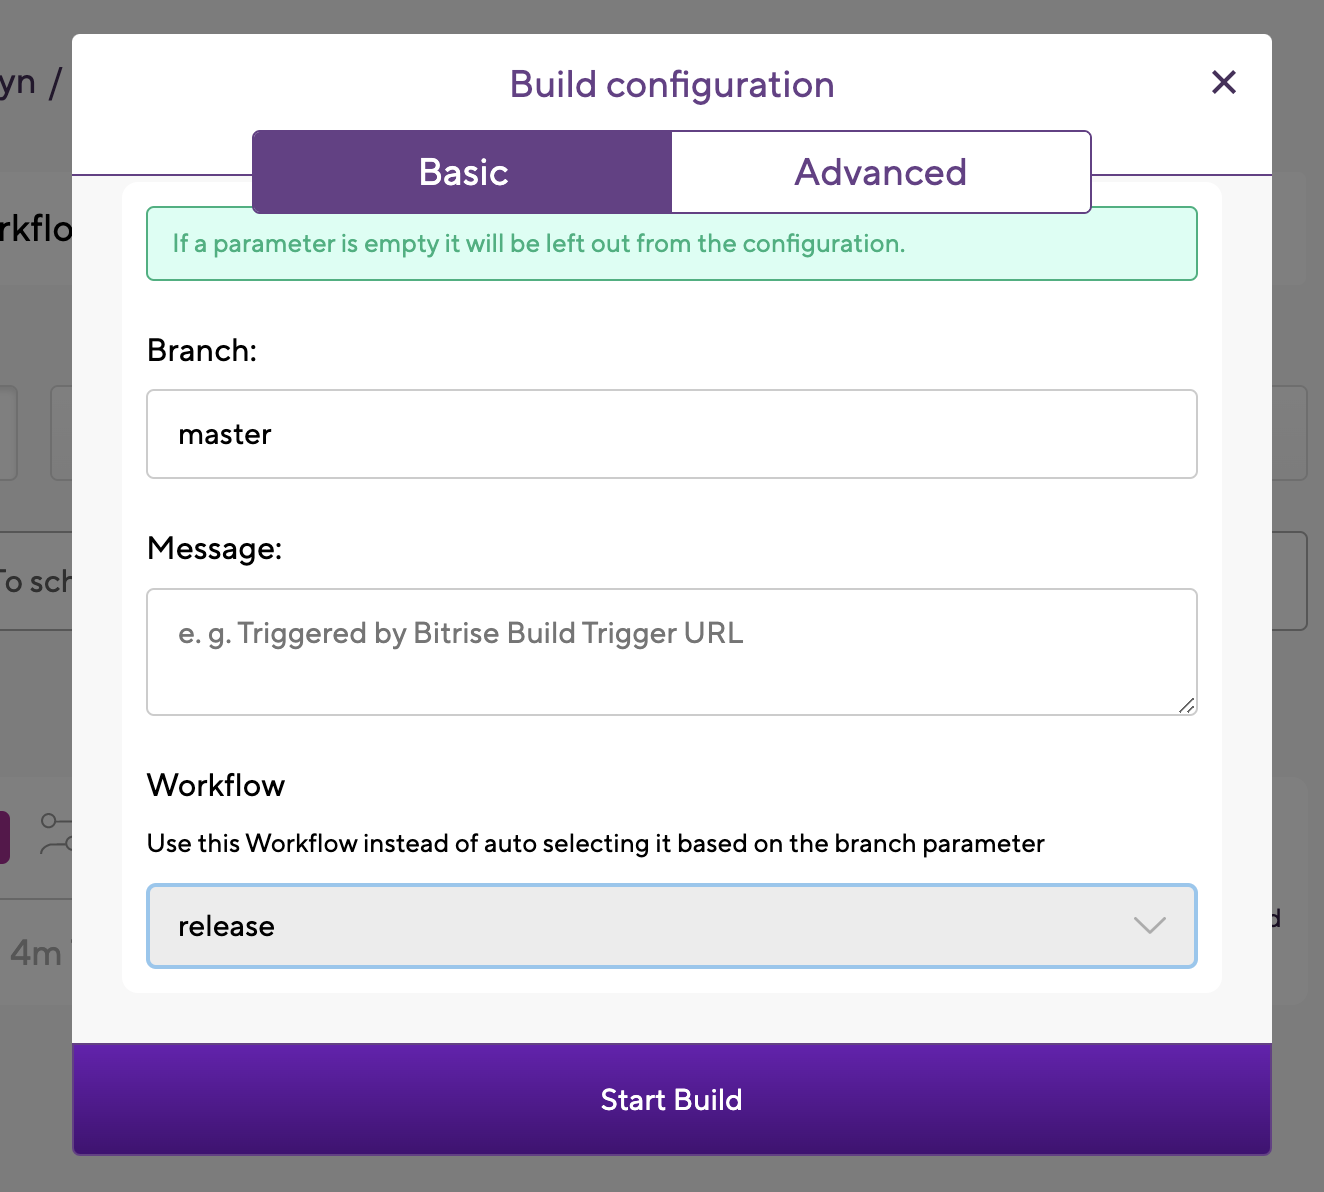
Triggers are great for automatically starting workflows in response to events happening on your version control system, but you can also manually start workflows right from the Bitrise UI. Let’s do this now to run our new release workflow for the first time.
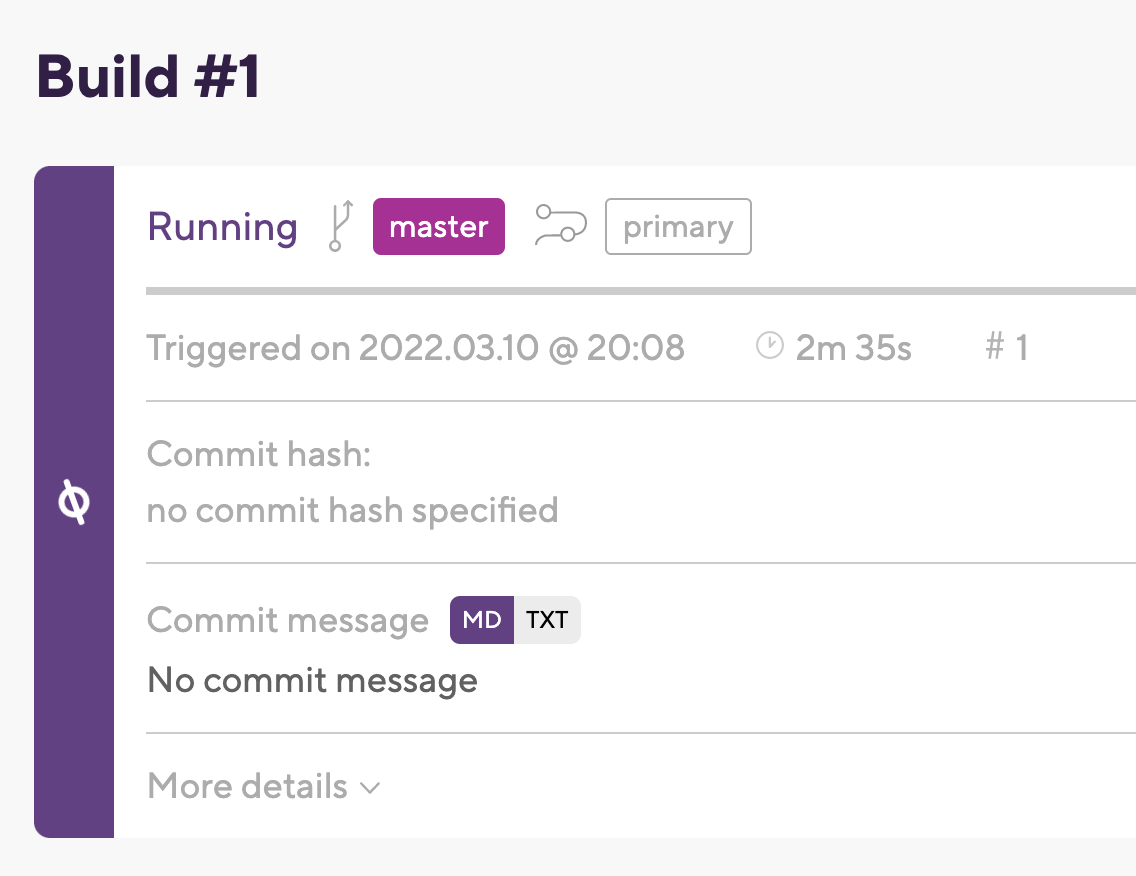
From the main app dashboard, click “Start/Schedule build”. Choose a branch for your workflow to be run on, and then select release as the workflow.
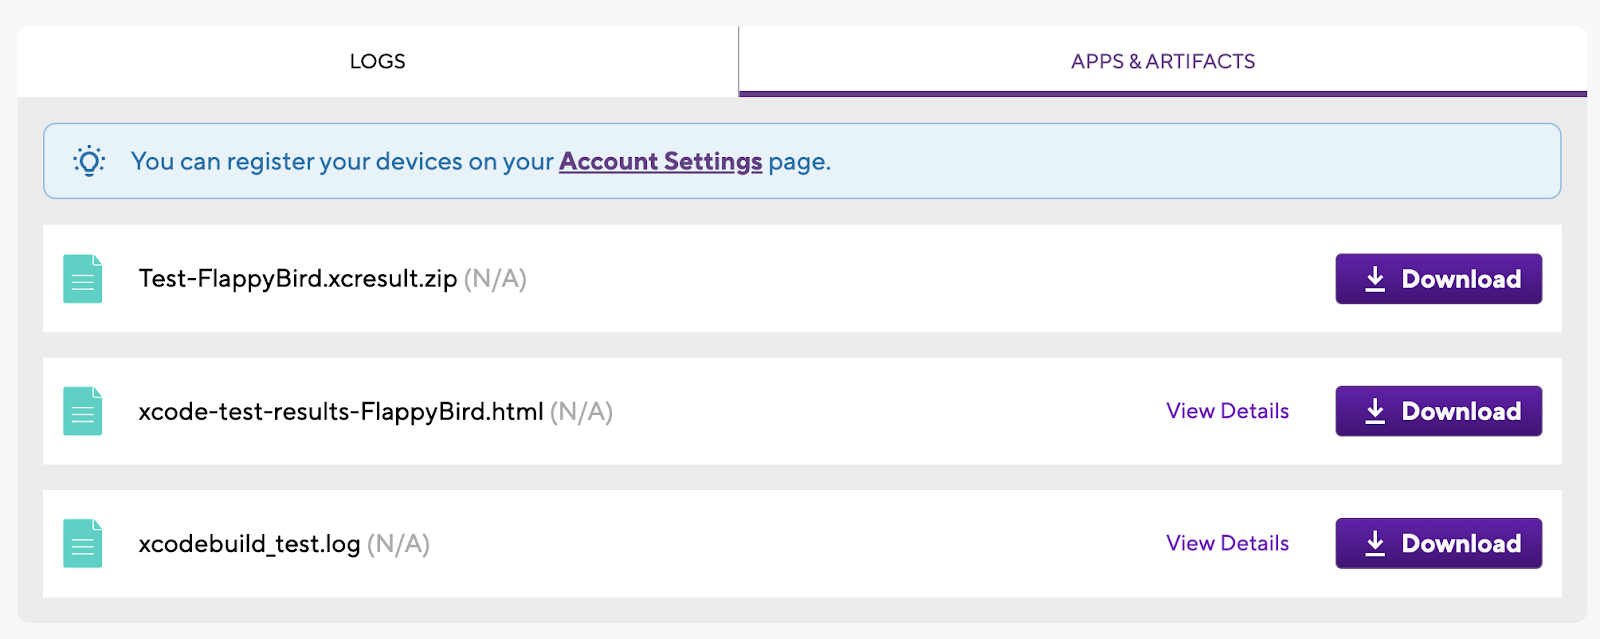
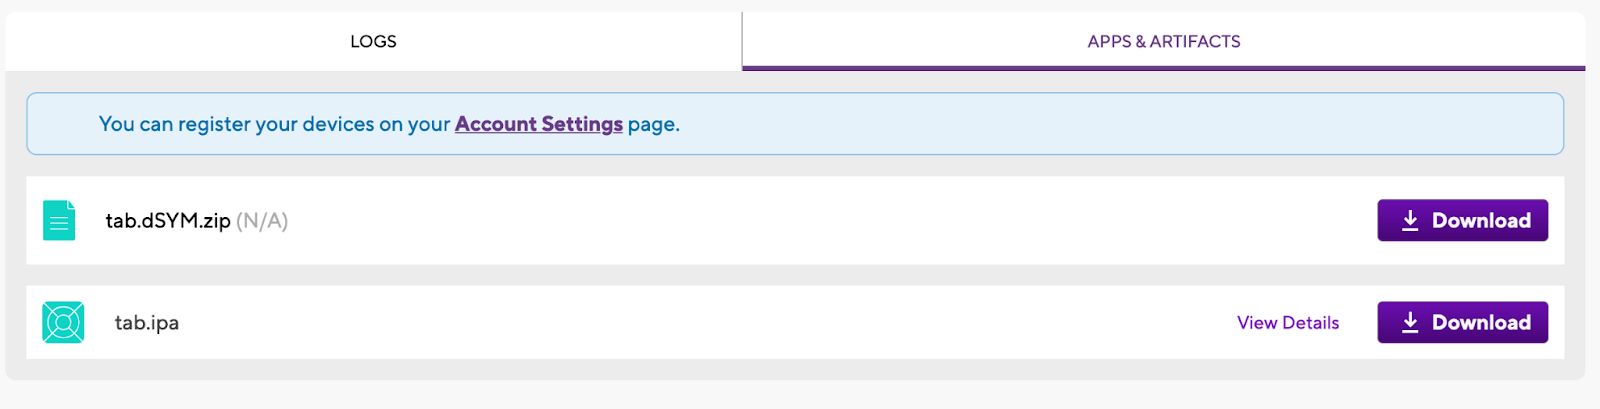
The release workflow will run through each step we defined above, and at the end of all of that an IPA will be uploaded to App Store Connect. We can also find any artifacts created as part of the workflow (including the final <code>.ipa<code> file and the dSYMs for the binary) on the “Apps & Artifacts” tab in the workflow run’s build page. The logs for the workflow run will also appear there.
And that’s it! We’ve successfully set up a build & deploy workflow for an iOS app entirely using Bitrise’s UI. Now, with this pipeline in place, anyone on your team is empowered to create and upload builds, removing a common bottleneck while also increasing reliability and consistency in the process. And you don’t have to stop there – in addition to all of the (open source!) Bitrise-maintained workflow steps available in the UI, there are plenty more steps created and maintained by the awesome community of mobile developers leveraging Bitrise to improve their own CI/CD pipelines.
Questions or issues? Get in touch!


